


Building Our Hard-Top Bimini
Our vinyl bimini had done remarkably well, but at 14 years old it was end of life – especially when Ceu put her knee through it. So it was time for a new one, and we decided to build a nice new hard top from scratch. Documented here is the process we went through:
Stage 1 – Planning.
Countless nights thinking through how we were going to achieve this engineering feat. I wanted to use the plastic honeycomb panels so as to get as light a structure as possible. And I wanted to do it myself. I figured we could do it in-situ using the existing stainless tubing as the supports for the new bimini. I calculated that it would weigh about 150lbs. We would recess into it the wiring for the lighting.
Stage 2 Buying Supplies.
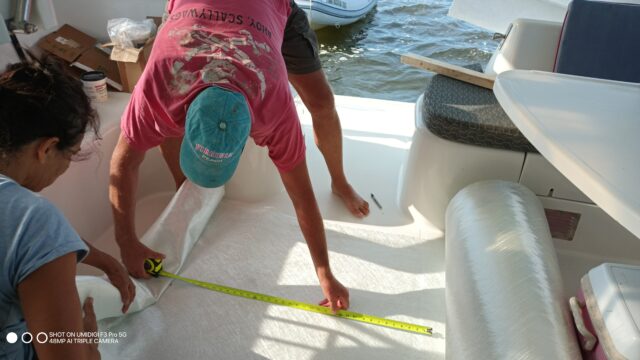
On arriving in Norfolk, VA from Canada we rented a van so we could go an pick up the supplies for the project. Eastern Burlap was the company, and they calculated how much materials we needed. This ended up being quite a bit more that I had previously calculated at home. But, hey, they are the experts. As it turned out, we bought way too much cloth and resin. That means we spent more than we needed to. But at least it means the bimini is not as heavy as it would have been with all that stuff. We also ended up runing short of gel coat, but that was because it started to go lumpy in the can and became unusable. I guess it was too close to its shelf life.
Here is what we bought (some of this came from Amazon and other suppliers that we had delivered directly to the Cape Charles boat yard):
5 x 8′ x 4′ panels of Carbon Core (the brand) 1″ honeycomb panels. (other brands are Nidacore and Plascore). This has a scrim (cloth) bonded to each face which is designed to be able to absorb and adhere to fiberglass resin.
4 x 5 gallons of regular polyester resin, no wax
1 x 5 gallons of white gel coat, no wax
1 quart of MEKP catalyst
1 roll (230 lbs) of 17 ounce biaxial cloth with shopped strand materials
1 roll of 6″ glass fiber tape
1 tub of chopped glass fiber filler
1 tub of silica thickener
1 split ring roller
chip brushes
1 gallon acetone
100 latex gloves (unlike nitrile they don’t disolve in acetone)
20 PVC 1″ pipe clamps with machine screws to fit
10 stainless steel 1″ pipe clamps
box of stainless steel machine screws
box of 1 1/2″ coated construction/decking screws
Flex-a-rail track
Keder Welt: 7.5 mm White Keder Welt
Flex-A-Rail Screws – Pack of 100
2 x 24″ x 48″ 3/8″ clear acrylic sheet
3 tubes Dow Corning 975 sealant
3 x LED red and white ceiling lights
1 roll of tinned copper wire (2-strand, red and black)
5 x 5ml syringes (to measure out the MEKP)
Plastic yogurt pots for mixing resin
Stiring sticks
Plastic sheeting to proect the boat
10 rolls of blue painter’s tape
Wood molding for the edges (Home Depot)
Plastic molding for the targa arch (see below)
5 lengths of 2×3 lumber
And for tools we used:
2 orbital sanders with sanding disks and paper
18v hand drill
Sailrite LZ sewing machine
Router
Circular saw with a blade suitable for cutting fiberglass
Total cost was about USD $2500
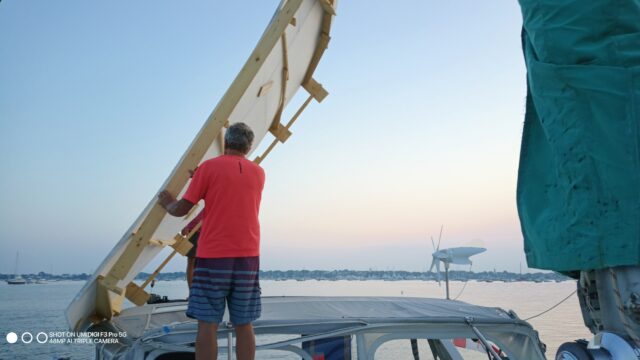
Stage 3 Building the frame.
We decided that we would build this in-situ on top of the existing vinyl bimini. This meant that we would not be stuck at some dock trying to rush the job so we could go cruising. Instead, we would do it as we traveled the East Coast and as the weather permitted. The bimini would rest on the existing stainless steel bars that were already supporting the vinyl top, and had shown themselves to be strong enought to support us walking on them.
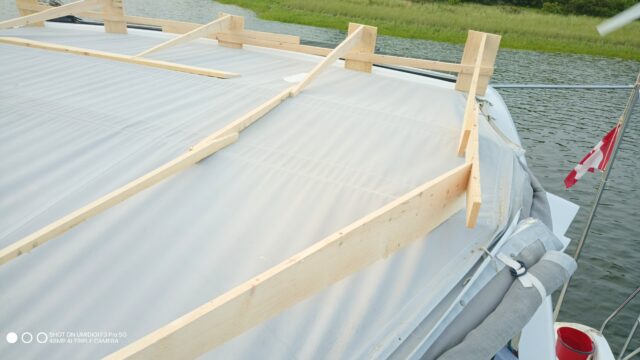
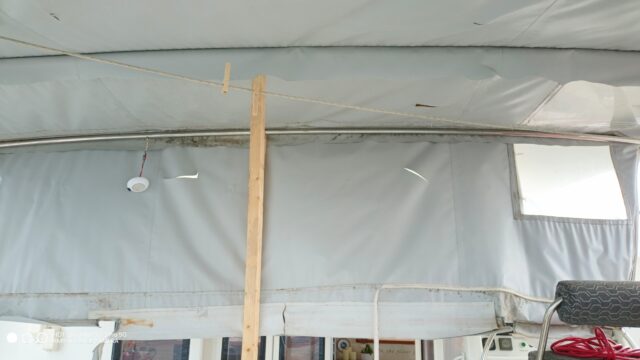
We would build a wooden frame that would match the shape and curves of the exising bimini, but would be inverted and would sit on top of the existing bimini. We would then lay the honycomb panels on top of the frame so they would take the desired shape.
Using string stretched across the existing frame we measured offsets from the string to the bars so that we could replicate the curves on the wooden frame. The frame was then screwed together using those measurements, but upside down so that the frame then presented a concave surface into which we could lay the honeycomb panels. Lots of discussion and re-measuring took place as we both eyeballed and measured the numbers produced. Eventually we were happy with the numbers, and so we could build the frame to those numbers.
The frame was not very elaborate. All it needed to do was provide guidance for the shape of the panels.
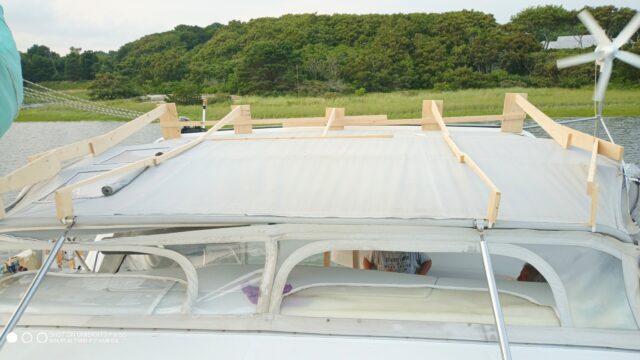
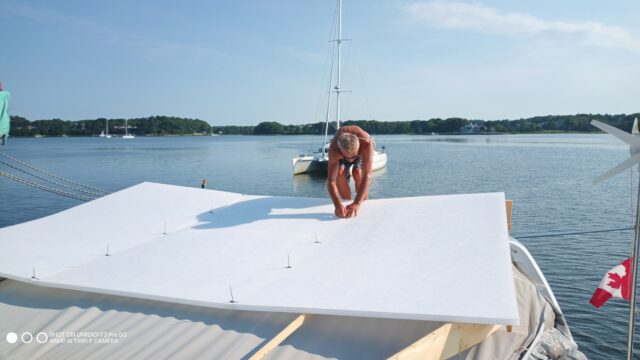
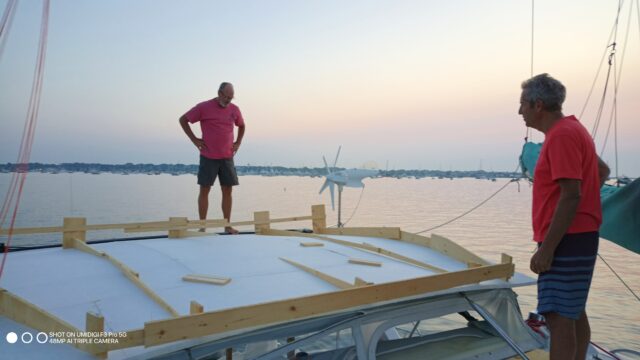
Stage 4 laying the honecomb panels on the frame.
We had five panels which we layed on top of the frame. We stitched the panels together at the edges using cable ties. This did not actually work all that well as getting the butting edges flush with each other. So then we actually screwed some flat pieces of wood across the joints to make them more flush with each other. This was actually a better solution as it provided a smother junction.
Since the original bimini was actually wider than 12′ we had to attach some ‘wings’ to the edges. The pieces of wood screwed in also helped support these wings. The hope was that once everything was all glassed-up everything would stay in place!

The 1″ honeycomb had sufficient flexibility to adopt the curves of the frame, so that was gratifying.
Stage 5 Protecting the rest of the boat.
As always, it is the preparation that takes up most of the time. In this case we had to cover large areas of the boat and solar panels with sheets and plastic sheeting to catch drips and spills.
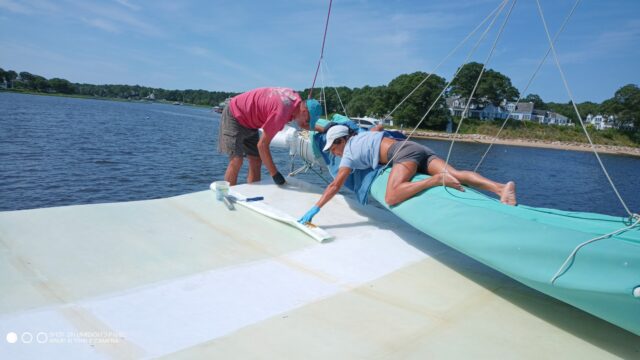
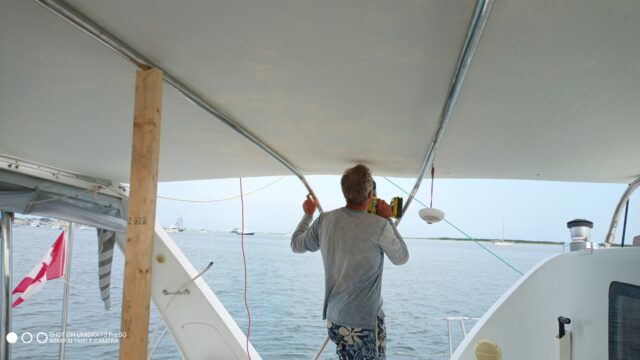
Stage 6 Glassing-up the upper surface of the panels.
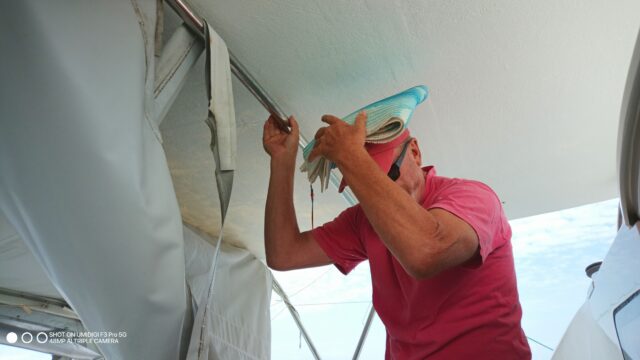
Now came the tricky part. The structure at this point was still very fragile and would not support a person’s weight. But somehow we had to lay out the fiberglass cloth over it, and then roll in the resin so that it gets properly absorbed and ‘wetted out’. Unless this is done properly the structure would not have any structural strength. We decided to put one layer of cloth on the first surface (which would become the underside) and then two layers on what would become the bimini’s top surface. The thinking her is that the under surface, which is concave, would be in tension, and the upper surface, which is convex, would be in compression both across the span, and also locally where someone stands on it. So that would need more local stiffness to support a person’s weight.
To achieve this, we had Ceu lying on the boom rolling in the resin. Meanwhile Noel would manipulare the position of the boom so she could reach all parts of the structure, and Kevin would be in charge of mixing up supplies of resin and catalyst as they were needed. Which was pretty much constantly. It would have been hard to do this without Kevin’s help, so we are very appreciative of his time (rewarded with lots of rum!).
We started by having Kevin put the 6″ fiberglass tape along all the seams.

Then we layed the glass cloth over that. Ceu would first wet out the honecomb panel with ample resin. Then we layed the fiberglass cloth on that, poured more resin onto it, and rolled it out thoroughly so that there were no visible air bubble and it had all turned translucent.
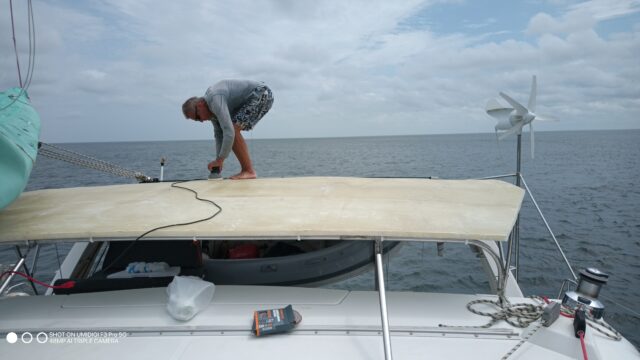
The next day we then rolled three coats of white gel coat onto the surface. The first two coats were no-wax, so that it would stay tacky. Then into the last coat we mixed 2% of wax additive which prevents the air-inhibition and thus allows the gel coat to fully cure. This was again all done from the boom.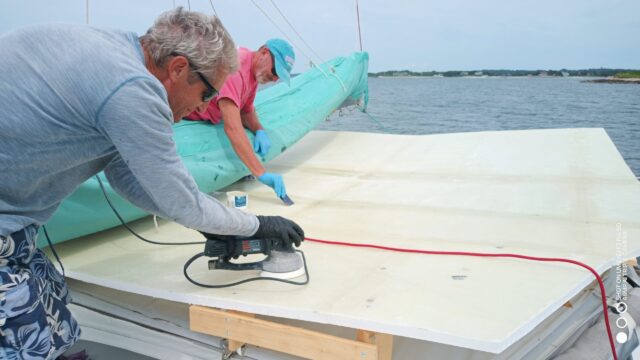
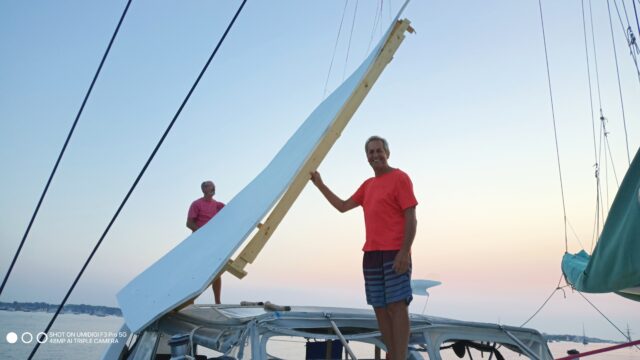
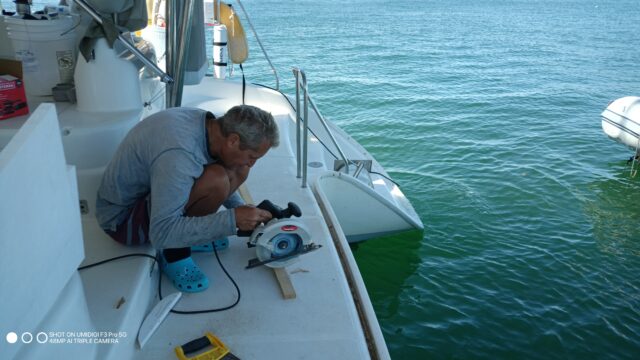
Stage 7 Preparing the targa arch.
At this stage we used a length of 1 1/2″ x 1″ rectangular PVC molding to provide the support for the aft edge of the bimini where it would attach to the targa. We cut along the length of the modling with the circular saw to match the angle that the bimini would make with the forward surface of the targa.
After we removed the existing aluminum track into which the vinyl bimini was attached, we could then screw the new PVC molding into the same holes.
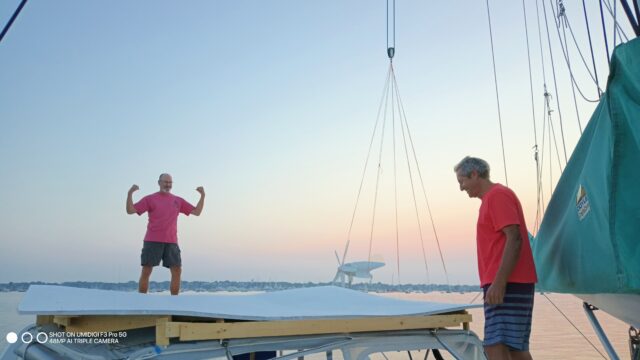
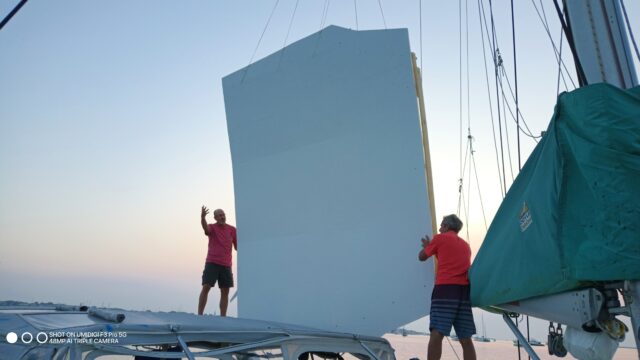
Stage 8 Flipping the structure.
This was the bit we were most nervous about. The structure now had cured fiberglass, one layer thick, on the convex surface and nothing on the bottom convex surface. We needed to flip it all over so that it was right-side up, resting on the existing stainless bars of the vinyl bimini. Our worry was that when we did so, it would all fold up along the seams that, frankly, did not yet have much strenght to them.
To provide more rigidity we screwed through the fiberglassed panels into the wooden frame.
Then we tied a number of pieces of string to one edge of the panels and frame. These we brought together like on a parachute and tied them to the mainsheet halyard.
First we had to wait for a windless day. We didn’t want this large surface area to be pulled about by a breeze!
While Ceu winched up the halard, Kevin and Noel guided the structure up to vertical and then down on the other side. Nothing fell apart. Phew! And the curves of the panel conformed well to the shape of the metal frames.
We could then remove the screws and the frame. Their job was done.
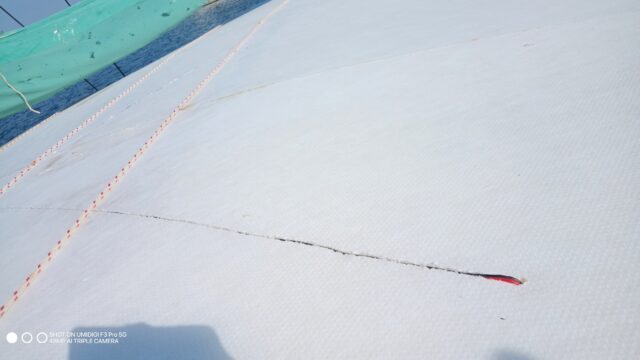
Stage 9 Glassing up the top side.
At this stage we could not walk all over the panels, but we could stand on the areas that were directly on top of the stainless bars that supported them. We needed to do this so that we could cut a groove into the surface into which we could lay the electrical wiring for the lighting. This came up from the bottom surface, through a hole in the panel, then fanned out to the three lamp locations, and then each of those again went down a hole to the under surface to supply the lamp. First step, therefore was to put some struts in place to support the stainless bars for walking on.
Originally we had planned to install some conduit piping for the wire, but in the end we decided to just cut a groove with a 1/4″ router into which we pushed the wire so that it was flush with the surface.
Having done that we could then lay 2 layers of fiberglass cloth using the same proceedure as before: Ceu would lie on the boom. She would roll resin onto the surface of the honeycomb panel. Then we would lay the first layer of cloth onto that. Resin would be poured onto that and rolled in. Then the second layer of cloth was laid so that it overlapped the edge of the first layer, and it too would be saturated with resin. Again this was a three person job.

Stage 10 Attaching the bimini to the targa arch.
Drilling down through the bimini panels we could now screw the aft end of the new structure into the top surface of the PVC molding on the targa arch.
Stage 11 Attaching the side and front rails.
The wood moldings from Home Depot were then screwed into the edge of the panels. This was to provide both a drainage gutter for water, and also hand-holds for the crew. Since we were just screwing into soft plastic, the screws did not, of course, provide any strength. Their function was simply to hold the side rails in place for the next part of the plan.
With the side rails tacked into place, we then mixed up some resin with the chopped fiberglass strands to make a thickend paste. These strands provide strength which would not be provided just by resin or resin thickened with silica powder. This paste was then smoothed into the joints between the molding and the panels, both on the top surface and the under surface. The purpose here is to provide a fillet that would firmly and strongly attach the wood to the panels. A rounded tongue depressor was used to get a nice curve in the fillet – rather like applying silicone sealant around a bathtub.
Using some 1/4-round PVC molding and double-sided carpet tape we were able to fashion a 1/2-round beading for the front lip of the bimini. This we again held in place with a combination of screws and tape while we glassed over it with the 6″ fiberglass tape.
Stage 12 Removing the old bimini.
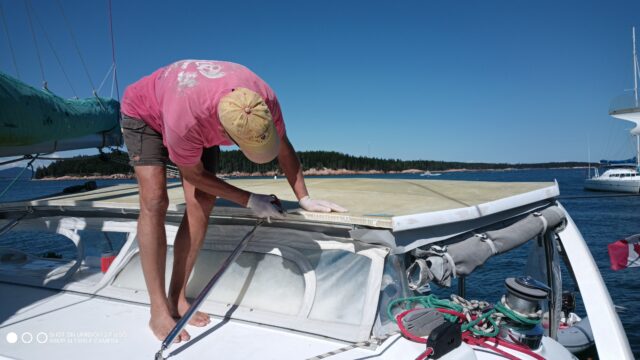
We had left the old bimini in place as it provided support for the stainless steel bars on which the new bimini was resting, and also provided a bit of protection for drips.
But before we could remove it, we needed to mark onto the new under-surface the position of the skylights, which we did with just a marker pen. We also marked the position of the stainless bars.
Then we could removed the old vinyl, making sure that the stainles bars stayed in the right place to support the new top.
Stage 13 Attaching the pipe clamps.
Drilling through the panels, we could now attach the plastic pipe clamps to the stainless bars so as to secure them in position. Now the bmini was properly supported and would be weight bearing. We could walk on it.
Stage 14 Fitting the skylights.
The sheet of acrylic was cut into two pieces of 24″ by 20″ with the circular saw.
Using the marks as guides we then cut out the holes for the skylights. The hole from the underside was 22″ x 18″. From the top we then used the circular say to cut halfway through the panel for an opening of 24″ x 20″, ie 1″ larger than all around than the lower surface.
Using a sharp knife we could then slice along the glassfiber of the lower surface, into the plastic, so as to remove that 1″ border, leaving a shelf onto which the windows could site. However, by itself this would not be very strong, so we glued in some 3/8″ thick x 3/4″ wide pieces of wood around the opening. Then we filled in the gaps with some more of the thickened resin that we used for the side rails. This provided a thicker shelf on which the windows would lie.
After that was all set and hard, we squeezed out lots of Dow 795 all around the window frame and set the windows into place. Not ideal, but we had to do this in two stages, as we ran out of sealant and had to order more.
Stage 15 Sealing the targa – bimini joint.
We put clear scotch tape over the joints of the molding that was screwed into the targa so as to preven spills. As it happend, some still manage to creep through. From the top side we then poured slightly thickened resin down the gap betwee targa and bimini both for some structure support and for water sealing.
Stage 16 Gel coat onto the side rails.
Using silica powder to thicken some gel coat, we then applied this to the outside surface of the side rails. This was to fill in any defects such as the screwheads that we used to hold the sides in place. After sanding this down and repeating a couple of times we could then roll on a final coat of gel coat. It is hard to get this nice an smooth.
Stage 17 Final Gel coat and Flexstone
With the skylights in place we could now roll on the gel coat for the top surface. We also poured some more gel coat into the targa-bimini joint. We did only one coat of gel coat.


The final treatment was to apply a coat of white aliphatic urethane (special order from Flexstones.ca). We could have just done another coat or two of gel coat, but since we had this for doing our side decks we decided to also put it on the bimini top.
While the urethane was still wet we immediately sprinkled white flakes on top. The next day we swept off the excess flakes, and then covered it all with one coat of clear aliphatic urethane. See our post on Fixing up our Non-skid. The claim is that this would last many years. We shall see.
Stage 18 Attaching the side curtains.
Now that the structure was in place we could screw into place the flex-a-rail tracking. We used the plastic tracking that we ordered on the sides, and re-used the aluminum track that we removed from the targa for the front.
We then had to sew the Ketter Welt onto the old vinyl siding so that we could use the same vinyl on the new bimini. With a bit of creative adjustments this worked well.
Stage 19 Supporting the Front Lip of the Bimini
The front lip of the bimini was attached to the front stainless steel bar with the plastic pipe clamps. However, we discovered that when sailing the force of the mainsheet, which runs along a traveler track on top of the targ, was actually flexing the targe. This resulted in the whole bimini sliding for and aft about 1/4 inch. Trouble was, the fron stainless bar was triangulated into position with two support bars that were screwed into the coach roof. Thus this bar could not move, while the bimini was sliding back and forth. This was enough the break the plastic clamps.
The solution we decided on was to replace those clamps with stainles ones and also to remove the supporting struts. The role of the struts was to hold the bar in place while it suppored the vinyl bimini. That was not longer needed. Now without the struts the bar, which was hinged when it attached to the coach roor and was held to the bkmini by the stainless clamps, could flex and move along with the bimini.
Obesrvations:
Having multiple friends of Kevin available to receive Amazon packages for us in various locations was a lifesaver.
Lying on the boom was hard work, but worked well. However, the cradle cover (stack pack) did suffer from a number of splashes of resin. Fortunately we had already planned to replace it (next year) so we weren’t to concerned about that. Had it been a newer cradle cover, however, this would have been a big problem. Not sure how one would protect it.
Weather was a big factor. Fortunately we had a lot of days of calm mornings. We had good weather, but often we had heavy dews in the morning that prevented any early start to the working day. The whole project took two months, during which time we also cruised the New England coastline from Cape Cod up to Maine and back.
Estimating material requirements was not easy. We ended up using more than my initial calculations, but less than Eastern Burlap’s calculations. But better too much than too little, as it proved very hard to buy supplies anywhere else. The gel coat did not last the duration and started the lump and thicken before we could finish. We then had to find some more gel coat which took us 2 MONTHS before we could finally get some delivered from Amazon. The main problem was that we were on the move, and could not wait a week for someone to order some in for us.’s