


Fixing up Our Non-Skid
In 2001 we had the boat painted with Awlgrip – decks, coach roof, and everthing else on top.
That turned out to be a big mistake. ‘Perfect Finishes’ in Trinidad did a far-from-perfect job – so much so that we had to come back the following year to have it re-done.
One of the challenges was what do do about the non-skid pattern on our decks. The Awlgrip that was applied, though it still retained the pattern, was way too slippery, but what to use instead that would still look good?
Then one summer back home we needed to fix up our sun deck. The vinyl membrane on it had become sun damaged and looked like it had huge rust patches all over it. So we painted it over with a product called Flexstones which consists of a layer or two of special urethane onto which one sprinkles little plastic flakes and the finally it gets sealed with a final clear top coat.
We were impressed with the finish it produced on our sun deck, so we decided to try it on the boat.
So we ordered a custom supply of white aliphatic urethane and some clear top coat, plus white flakes, which were drop shipped to us at Cape Charles Yacht Center from California.
Because of building our bimini, it took until October before we could get around to doing our decks and the top of the bimini with the new Flexstones product.
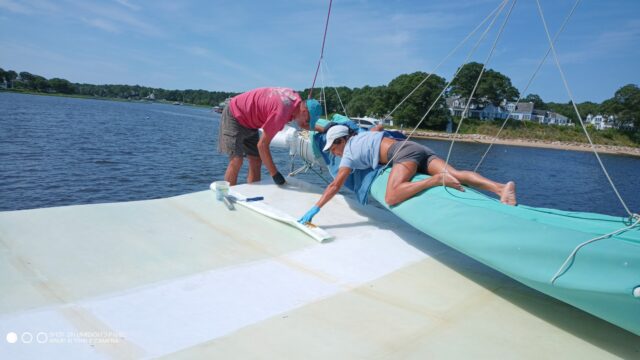
The process has three steps: roll on a coat of white aliphatic urethane.
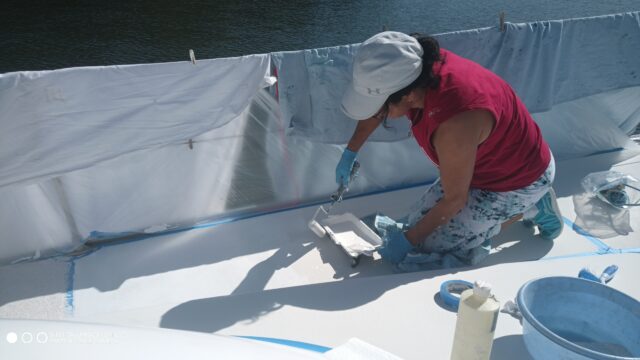
Then sprinkle on the colored chips.
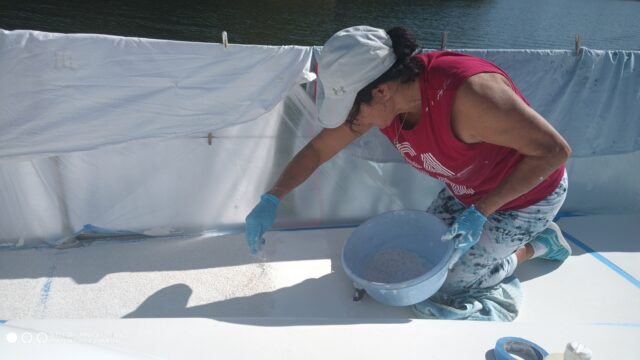
Sand these down very gently just to remove any pointy bits. And finish with a coat of clear colourless aliphatic urethane.
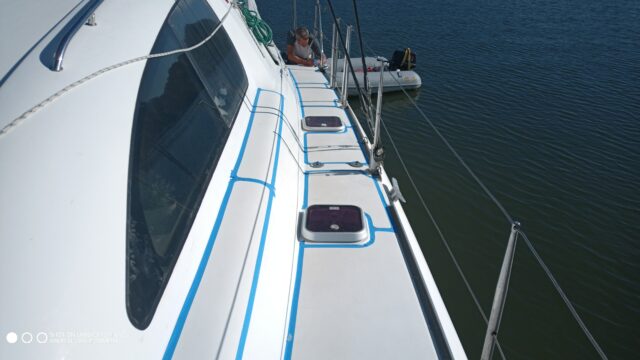
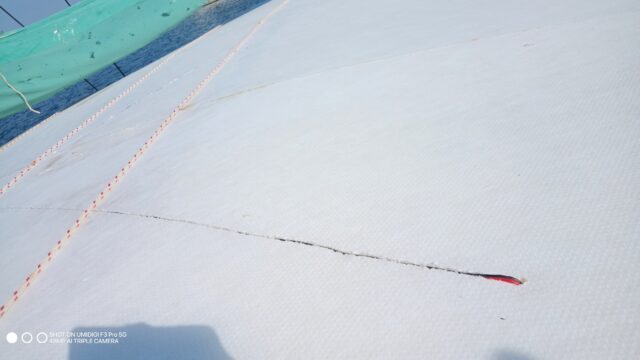
With bare feet on wet decks it is still a bit slippery. But with deck shoes the grip seems to be really good.

Top is the new Flexstones covering, bottom is the old patterned gelcoat
And it looks really good too. At least it does when it is clean. But it does get dirty easily (as did the old decks), but it takes a bit more effort to clean than the Awlgrip or bare gel coat did.
Still, as it is supposed to last for at least a decade, if not two, we are hoping that the non-skid problem is now solved.
Building Our Hard-Top Bimini
Our vinyl bimini had done remarkably well, but at 14 years old it was end of life – especially when Ceu put her knee through it. So it was time for a new one, and we decided to build a nice new hard top from scratch. Documented here is the process we went through:
Stage 1 – Planning.
Countless nights thinking through how we were going to achieve this engineering feat. I wanted to use the plastic honeycomb panels so as to get as light a structure as possible. And I wanted to do it myself. I figured we could do it in-situ using the existing stainless tubing as the supports for the new bimini. I calculated that it would weigh about 150lbs. We would recess into it the wiring for the lighting.
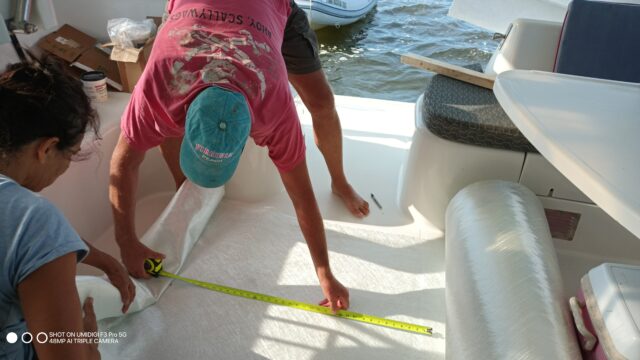
Stage 2 Buying Supplies.
On arriving in Norfolk, VA from Canada we rented a van so we could go an pick up the supplies for the project. Eastern Burlap was the company, and they calculated how much materials we needed. This ended up being quite a bit more that I had previously calculated at home. But, hey, they are the experts. As it turned out, we bought way too much cloth and resin. That means we spent more than we needed to. But at least it means the bimini is not as heavy as it would have been with all that stuff. We also ended up runing short of gel coat, but that was because it started to go lumpy in the can and became unusable. I guess it was too close to its shelf life.
Here is what we bought (some of this came from Amazon and other suppliers that we had delivered directly to the Cape Charles boat yard):
5 x 8′ x 4′ panels of Carbon Core (the brand) 1″ honeycomb panels. (other brands are Nidacore and Plascore). This has a scrim (cloth) bonded to each face which is designed to be able to absorb and adhere to fiberglass resin.
4 x 5 gallons of regular polyester resin, no wax
1 x 5 gallons of white gel coat, no wax
1 quart of MEKP catalyst
1 roll (230 lbs) of 17 ounce biaxial cloth with shopped strand materials
1 roll of 6″ glass fiber tape
1 tub of chopped glass fiber filler
1 tub of silica thickener
1 split ring roller
chip brushes
1 gallon acetone
100 latex gloves (unlike nitrile they don’t disolve in acetone)
20 PVC 1″ pipe clamps with machine screws to fit
10 stainless steel 1″ pipe clamps
box of stainless steel machine screws
box of 1 1/2″ coated construction/decking screws
Flex-a-rail track
Keder Welt: 7.5 mm White Keder Welt
Flex-A-Rail Screws – Pack of 100
2 x 24″ x 48″ 3/8″ clear acrylic sheet
3 tubes Dow Corning 975 sealant
3 x LED red and white ceiling lights
1 roll of tinned copper wire (2-strand, red and black)
5 x 5ml syringes (to measure out the MEKP)
Plastic yogurt pots for mixing resin
Stiring sticks
Plastic sheeting to proect the boat
10 rolls of blue painter’s tape
Wood molding for the edges (Home Depot)
Plastic molding for the targa arch (see below)
5 lengths of 2×3 lumber
And for tools we used:
2 orbital sanders with sanding disks and paper
18v hand drill
Sailrite LZ sewing machine
Router
Circular saw with a blade suitable for cutting fiberglass
Total cost was about USD $2500
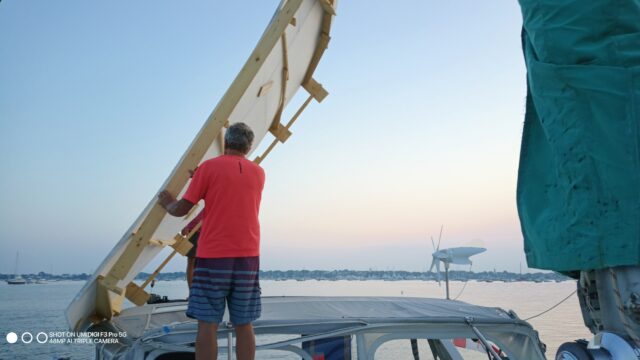
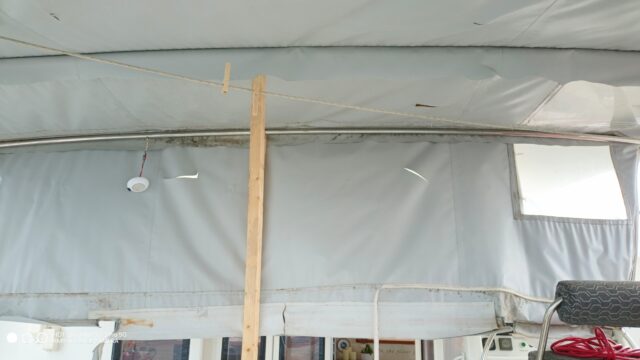
Stage 3 Building the frame.
We decided that we would build this in-situ on top of the existing vinyl bimini. This meant that we would not be stuck at some dock trying to rush the job so we could go cruising. Instead, we would do it as we traveled the East Coast and as the weather permitted. The bimini would rest on the existing stainless steel bars that were already supporting the vinyl top, and had shown themselves to be strong enought to support us walking on them.
We would build a wooden frame that would match the shape and curves of the exising bimini, but would be inverted and would sit on top of the existing bimini. We would then lay the honycomb panels on top of the frame so they would take the desired shape.
Using string stretched across the existing frame we measured offsets from the string to the bars so that we could replicate the curves on the wooden frame. The frame was then screwed together using those measurements, but upside down so that the frame then presented a concave surface into which we could lay the honeycomb panels. Lots of discussion and re-measuring took place as we both eyeballed and measured the numbers produced. Eventually we were happy with the numbers, and so we could build the frame to those numbers.
The frame was not very elaborate. All it needed to do was provide guidance for the shape of the panels.
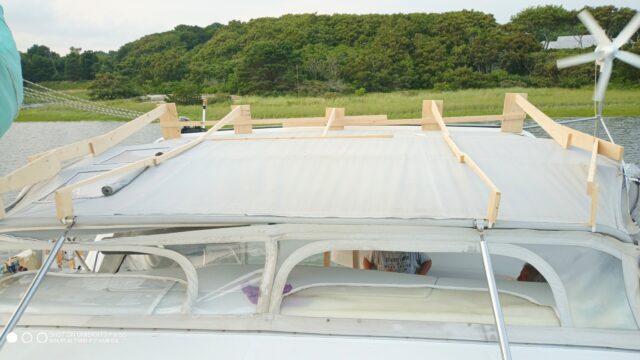
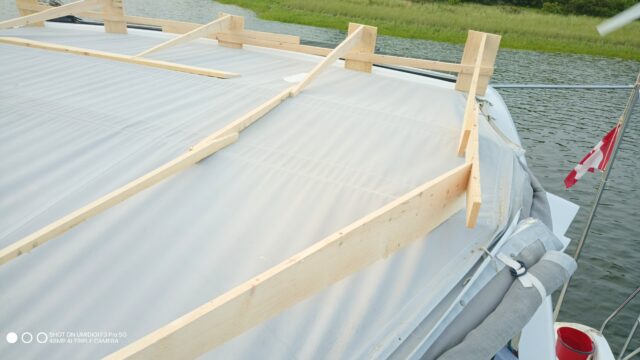
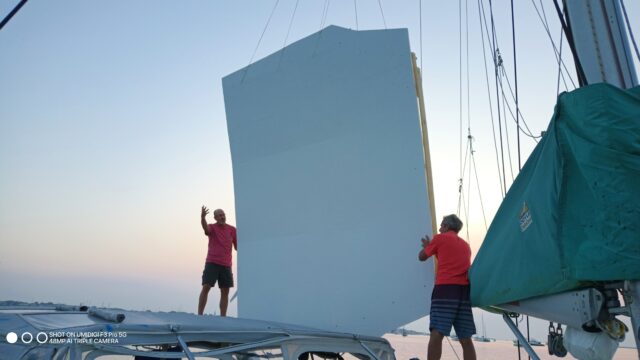
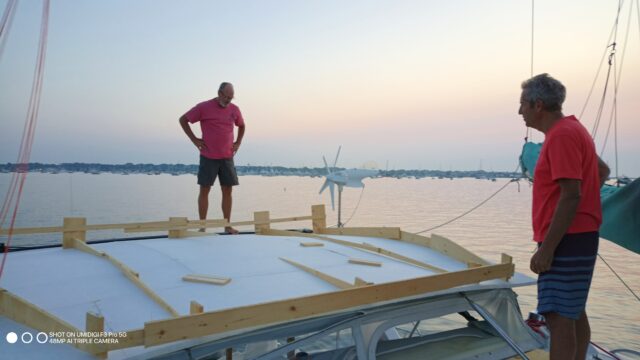
Stage 4 laying the honecomb panels on the frame.
We had five panels which we layed on top of the frame. We stitched the panels together at the edges using cable ties. This did not actually work all that well as getting the butting edges flush with each other. So then we actually screwed some flat pieces of wood across the joints to make them more flush with each other. This was actually a better solution as it provided a smother junction.
Since the original bimini was actually wider than 12′ we had to attach some ‘wings’ to the edges. The pieces of wood screwed in also helped support these wings. The hope was that once everything was all glassed-up everything would stay in place!

The 1″ honeycomb had sufficient flexibility to adopt the curves of the frame, so that was gratifying.
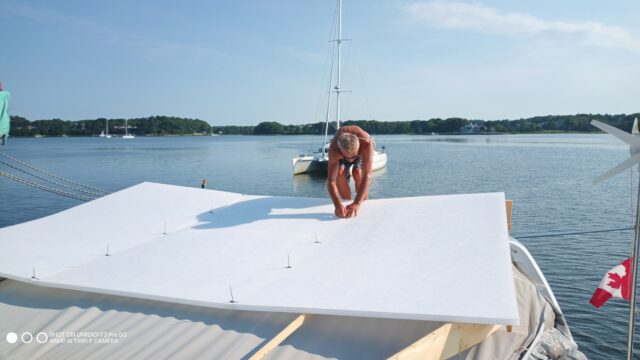
Stage 5 Protecting the rest of the boat.
As always, it is the preparation that takes up most of the time. In this case we had to cover large areas of the boat and solar panels with sheets and plastic sheeting to catch drips and spills.
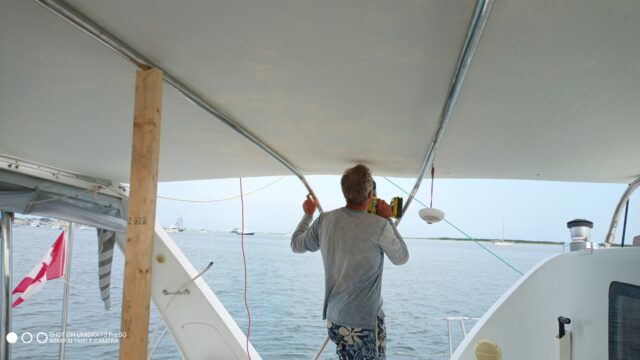
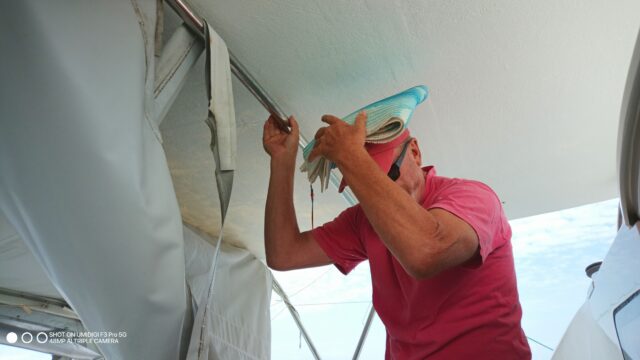
Stage 6 Glassing-up the upper surface of the panels.
Now came the tricky part. The structure at this point was still very fragile and would not support a person’s weight. But somehow we had to lay out the fiberglass cloth over it, and then roll in the resin so that it gets properly absorbed and ‘wetted out’. Unless this is done properly the structure would not have any structural strength. We decided to put one layer of cloth on the first surface (which would become the underside) and then two layers on what would become the bimini’s top surface. The thinking her is that the under surface, which is concave, would be in tension, and the upper surface, which is convex, would be in compression both across the span, and also locally where someone stands on it. So that would need more local stiffness to support a person’s weight.
To achieve this, we had Ceu lying on the boom rolling in the resin. Meanwhile Noel would manipulare the position of the boom so she could reach all parts of the structure, and Kevin would be in charge of mixing up supplies of resin and catalyst as they were needed. Which was pretty much constantly. It would have been hard to do this without Kevin’s help, so we are very appreciative of his time (rewarded with lots of rum!).
We started by having Kevin put the 6″ fiberglass tape along all the seams.

Then we layed the glass cloth over that. Ceu would first wet out the honecomb panel with ample resin. Then we layed the fiberglass cloth on that, poured more resin onto it, and rolled it out thoroughly so that there were no visible air bubble and it had all turned translucent.
The next day we then rolled three coats of white gel coat onto the surface. The first two coats were no-wax, so that it would stay tacky. Then into the last coat we mixed 2% of wax additive which prevents the air-inhibition and thus allows the gel coat to fully cure. This was again all done from the boom.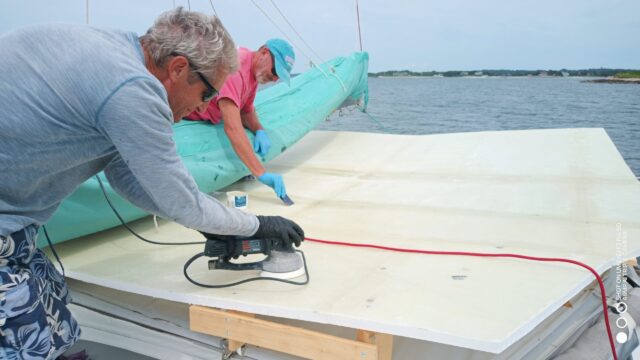
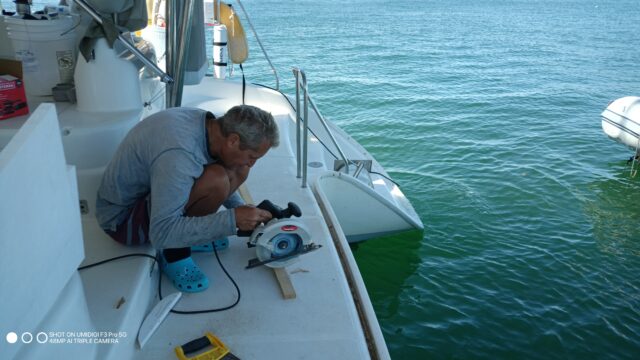
Stage 7 Preparing the targa arch.
At this stage we used a length of 1 1/2″ x 1″ rectangular PVC molding to provide the support for the aft edge of the bimini where it would attach to the targa. We cut along the length of the modling with the circular saw to match the angle that the bimini would make with the forward surface of the targa.
After we removed the existing aluminum track into which the vinyl bimini was attached, we could then screw the new PVC molding into the same holes.
Stage 8 Flipping the structure.
This was the bit we were most nervous about. The structure now had cured fiberglass, one layer thick, on the convex surface and nothing on the bottom convex surface. We needed to flip it all over so that it was right-side up, resting on the existing stainless bars of the vinyl bimini. Our worry was that when we did so, it would all fold up along the seams that, frankly, did not yet have much strenght to them.
To provide more rigidity we screwed through the fiberglassed panels into the wooden frame.
Then we tied a number of pieces of string to one edge of the panels and frame. These we brought together like on a parachute and tied them to the mainsheet halyard.
First we had to wait for a windless day. We didn’t want this large surface area to be pulled about by a breeze!
While Ceu winched up the halard, Kevin and Noel guided the structure up to vertical and then down on the other side. Nothing fell apart. Phew! And the curves of the panel conformed well to the shape of the metal frames.
We could then remove the screws and the frame. Their job was done.
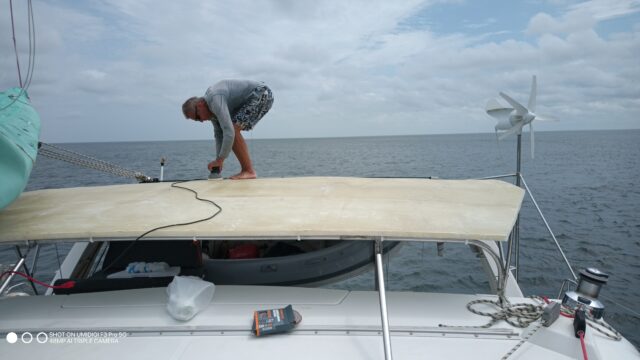
Stage 9 Glassing up the top side.
At this stage we could not walk all over the panels, but we could stand on the areas that were directly on top of the stainless bars that supported them. We needed to do this so that we could cut a groove into the surface into which we could lay the electrical wiring for the lighting. This came up from the bottom surface, through a hole in the panel, then fanned out to the three lamp locations, and then each of those again went down a hole to the under surface to supply the lamp. First step, therefore was to put some struts in place to support the stainless bars for walking on.
Originally we had planned to install some conduit piping for the wire, but in the end we decided to just cut a groove with a 1/4″ router into which we pushed the wire so that it was flush with the surface.
Having done that we could then lay 2 layers of fiberglass cloth using the same proceedure as before: Ceu would lie on the boom. She would roll resin onto the surface of the honeycomb panel. Then we would lay the first layer of cloth onto that. Resin would be poured onto that and rolled in. Then the second layer of cloth was laid so that it overlapped the edge of the first layer, and it too would be saturated with resin. Again this was a three person job.

Stage 10 Attaching the bimini to the targa arch.
Drilling down through the bimini panels we could now screw the aft end of the new structure into the top surface of the PVC molding on the targa arch.
Stage 11 Attaching the side and front rails.
The wood moldings from Home Depot were then screwed into the edge of the panels. This was to provide both a drainage gutter for water, and also hand-holds for the crew. Since we were just screwing into soft plastic, the screws did not, of course, provide any strength. Their function was simply to hold the side rails in place for the next part of the plan.
With the side rails tacked into place, we then mixed up some resin with the chopped fiberglass strands to make a thickend paste. These strands provide strength which would not be provided just by resin or resin thickened with silica powder. This paste was then smoothed into the joints between the molding and the panels, both on the top surface and the under surface. The purpose here is to provide a fillet that would firmly and strongly attach the wood to the panels. A rounded tongue depressor was used to get a nice curve in the fillet – rather like applying silicone sealant around a bathtub.
Using some 1/4-round PVC molding and double-sided carpet tape we were able to fashion a 1/2-round beading for the front lip of the bimini. This we again held in place with a combination of screws and tape while we glassed over it with the 6″ fiberglass tape.
Stage 12 Removing the old bimini.
We had left the old bimini in place as it provided support for the stainless steel bars on which the new bimini was resting, and also provided a bit of protection for drips.
But before we could remove it, we needed to mark onto the new under-surface the position of the skylights, which we did with just a marker pen. We also marked the position of the stainless bars.
Then we could removed the old vinyl, making sure that the stainles bars stayed in the right place to support the new top.
Stage 13 Attaching the pipe clamps.
Drilling through the panels, we could now attach the plastic pipe clamps to the stainless bars so as to secure them in position. Now the bmini was properly supported and would be weight bearing. We could walk on it.
Stage 14 Fitting the skylights.
The sheet of acrylic was cut into two pieces of 24″ by 20″ with the circular saw.
Using the marks as guides we then cut out the holes for the skylights. The hole from the underside was 22″ x 18″. From the top we then used the circular say to cut halfway through the panel for an opening of 24″ x 20″, ie 1″ larger than all around than the lower surface.
Using a sharp knife we could then slice along the glassfiber of the lower surface, into the plastic, so as to remove that 1″ border, leaving a shelf onto which the windows could site. However, by itself this would not be very strong, so we glued in some 3/8″ thick x 3/4″ wide pieces of wood around the opening. Then we filled in the gaps with some more of the thickened resin that we used for the side rails. This provided a thicker shelf on which the windows would lie.
After that was all set and hard, we squeezed out lots of Dow 795 all around the window frame and set the windows into place. Not ideal, but we had to do this in two stages, as we ran out of sealant and had to order more.
Stage 15 Sealing the targa – bimini joint.
We put clear scotch tape over the joints of the molding that was screwed into the targa so as to preven spills. As it happend, some still manage to creep through. From the top side we then poured slightly thickened resin down the gap betwee targa and bimini both for some structure support and for water sealing.
Stage 16 Gel coat onto the side rails.
Using silica powder to thicken some gel coat, we then applied this to the outside surface of the side rails. This was to fill in any defects such as the screwheads that we used to hold the sides in place. After sanding this down and repeating a couple of times we could then roll on a final coat of gel coat. It is hard to get this nice an smooth.
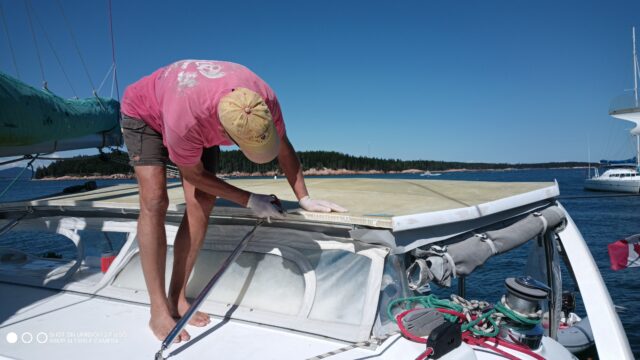
Stage 17 Final Gel coat and Flexstone
With the skylights in place we could now roll on the gel coat for the top surface. We also poured some more gel coat into the targa-bimini joint. We did only one coat of gel coat.


The final treatment was to apply a coat of white aliphatic urethane (special order from Flexstones.ca). We could have just done another coat or two of gel coat, but since we had this for doing our side decks we decided to also put it on the bimini top.
While the urethane was still wet we immediately sprinkled white flakes on top. The next day we swept off the excess flakes, and then covered it all with one coat of clear aliphatic urethane. See our post on Fixing up our Non-skid. The claim is that this would last many years. We shall see.
Stage 18 Attaching the side curtains.
Now that the structure was in place we could screw into place the flex-a-rail tracking. We used the plastic tracking that we ordered on the sides, and re-used the aluminum track that we removed from the targa for the front.
We then had to sew the Ketter Welt onto the old vinyl siding so that we could use the same vinyl on the new bimini. With a bit of creative adjustments this worked well.
Stage 19 Supporting the Front Lip of the Bimini
The front lip of the bimini was attached to the front stainless steel bar with the plastic pipe clamps. However, we discovered that when sailing the force of the mainsheet, which runs along a traveler track on top of the targ, was actually flexing the targe. This resulted in the whole bimini sliding for and aft about 1/4 inch. Trouble was, the fron stainless bar was triangulated into position with two support bars that were screwed into the coach roof. Thus this bar could not move, while the bimini was sliding back and forth. This was enough the break the plastic clamps.
The solution we decided on was to replace those clamps with stainles ones and also to remove the supporting struts. The role of the struts was to hold the bar in place while it suppored the vinyl bimini. That was not longer needed. Now without the struts the bar, which was hinged when it attached to the coach roor and was held to the bkmini by the stainless clamps, could flex and move along with the bimini.
Obesrvations:
Having multiple friends of Kevin available to receive Amazon packages for us in various locations was a lifesaver.
Lying on the boom was hard work, but worked well. However, the cradle cover (stack pack) did suffer from a number of splashes of resin. Fortunately we had already planned to replace it (next year) so we weren’t to concerned about that. Had it been a newer cradle cover, however, this would have been a big problem. Not sure how one would protect it.
Weather was a big factor. Fortunately we had a lot of days of calm mornings. We had good weather, but often we had heavy dews in the morning that prevented any early start to the working day. The whole project took two months, during which time we also cruised the New England coastline from Cape Cod up to Maine and back.
Estimating material requirements was not easy. We ended up using more than my initial calculations, but less than Eastern Burlap’s calculations. But better too much than too little, as it proved very hard to buy supplies anywhere else. The gel coat did not last the duration and started the lump and thicken before we could finish. We then had to find some more gel coat which took us 2 MONTHS before we could finally get some delivered from Amazon. The main problem was that we were on the move, and could not wait a week for someone to order some in for us.’s
Bahama Blues continues
Current Position: 25°26.11'N, 76°36.35'W
Distance sailed since last post: 4679 nautical miles
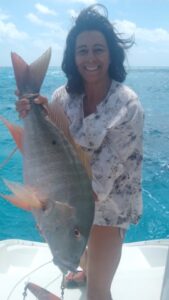
 As soon as we left Staniel Cay we caught a nice mutton snapper, that was exciting especially when were about to bring the line in, as we approach the National Park. The seas were smooth and I prepared the fish on the cockpit. With the small bits I made nice fish cakes for lunch. The rest made nice fillets. The bones made a yummy ch0wder.

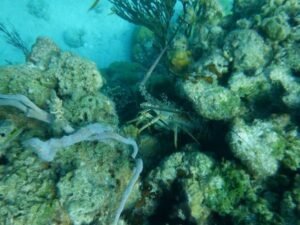
We finally got to see some nice lobsters wile snorkeling. Not that we are very good at catching them, but here fishing is prohibited as we are in Exuma Land and Sea Park area in Warderick Wells. Good snorkeling and a nice walk. Huge wales skeleton

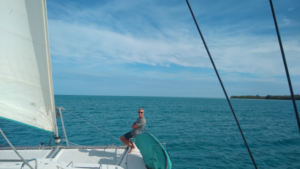
After spending a couple of days here we headed to Norman Cay. We had 16 kts of wind and a nice broad reach. Very big waves through the cut and big waves continued out to sea.
Little Pond Cay
Johnny Depp owns this gorgeous island
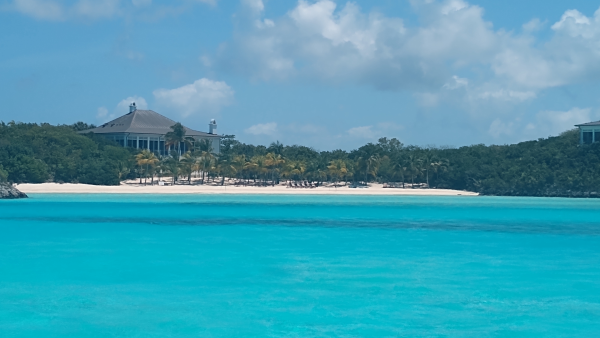

Although most privately owned islands around here only have a “Private, No trespassing” sign, Johnny Depp goes way beyond with this sign 0n his beach front.

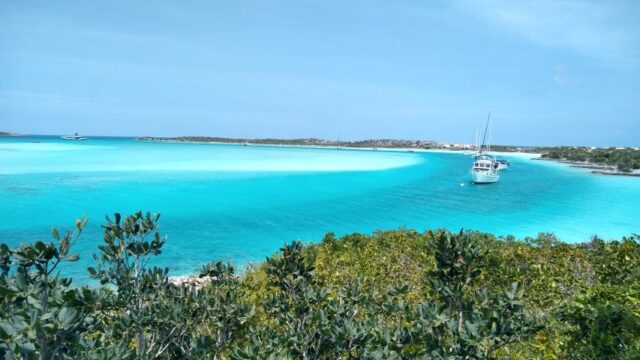
Big beautiful island, beautiful beaches but did not see any mansions, just smaller villas spread out. Gorgeous spot too, right next to the Exumas Park.
The island next to this one is White Bay Cay, owned by Tyler Perry, beautiful beaches backed by palm trees and mansions. Just gorgeous and upscale.
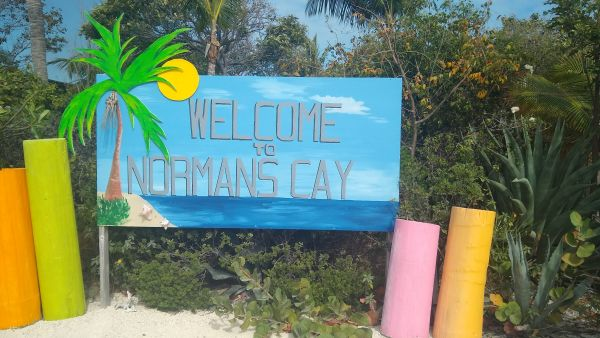
Norman Cay
For years, this small island, South of Nassau served as the headquarters for the Medellin Cartel s drug smuggling in the 70’s up to around 1982. Planes would land on the tiny man-made runway (which is thought to have been built by Pablo Escobar himself) to refuel before continuing their journeys to the USA to drop off their illegal cargo.
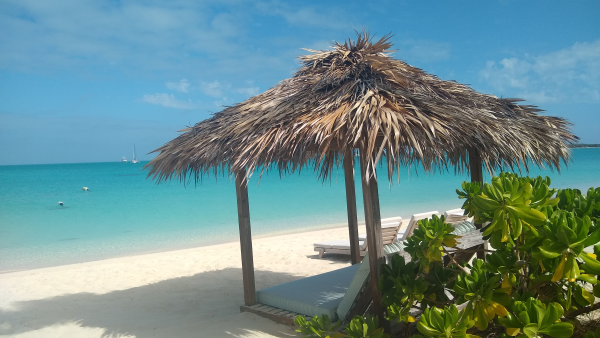
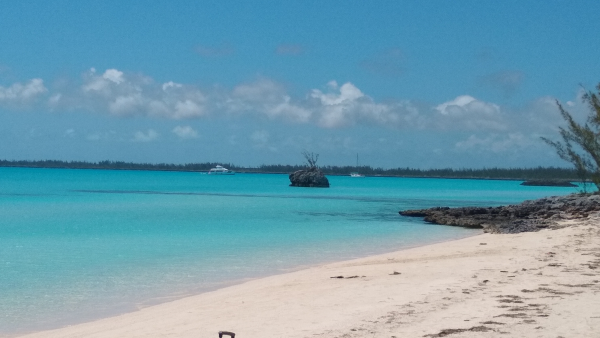
Beautiful Beach in front of Mcduffs restaurant and villas. The first day we anchored near the sunken plane so we could snorkel it. The second day we anchored right in front of this beach and from here we enjoyed a nice long walk through the island.
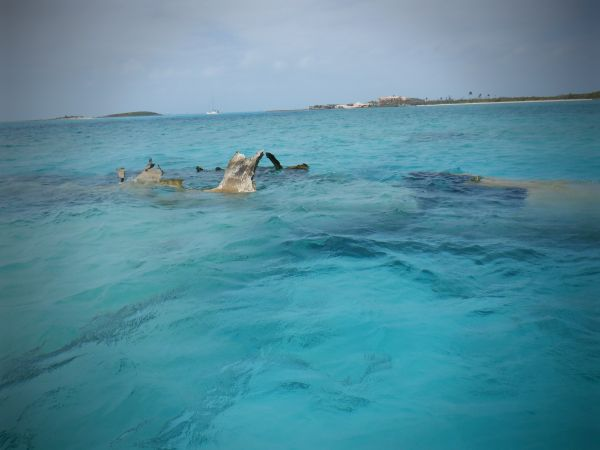
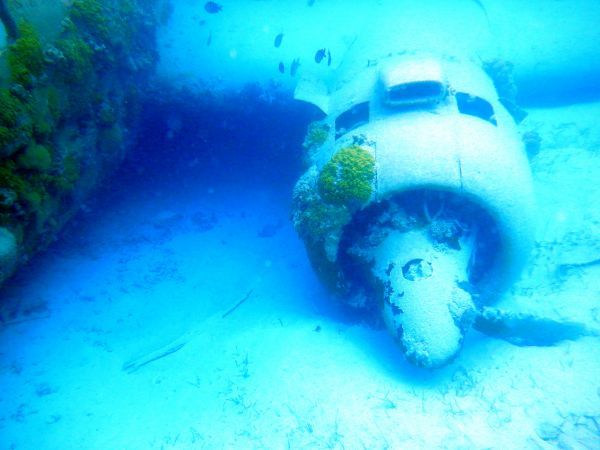
Pablo Escobar Crashed Plane
The Curtiss C-46 Commando once owned by Drug King, Pablo Escobar, lies in the beautiful turquoise waters in a sand bank so easy to snorkel.
The WWII-era plane was thought to be carrying cocaine when it landed just shy off the runway in 1980. It came to its final resting place on a sandbar between two outcrops of land on the southern end of Norman’s Cay.
Depending on the tides, the plane usually sits at a depth of around 10 feet below the surface, making it one of the most fascinating and easily accessible snorkel.
It is so impressive! Whats also interesting is that its not really advertised much in the Bahamas as a tourist attraction. so you find yourself anchored in this beautiful place with no one around. I guess the tourists are all gone to see the Exumas swimming pigs instead!
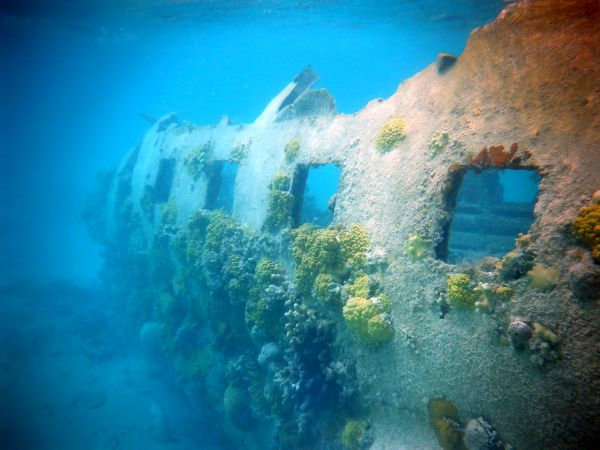
We loved exploring it. It was very cool. there were many colourful fish and marine life.

Eleuthera
We loved this island. We set off from Norman Cay expecting light winds but in our favor! well they lied. We had up to 20 kts and are now close hauled but still a fast trip. Anchored in Rock Sound. What a great spot. Well stocked market with fresh vegetables, including Kale. A short walk to the laundromat. Happy Happy
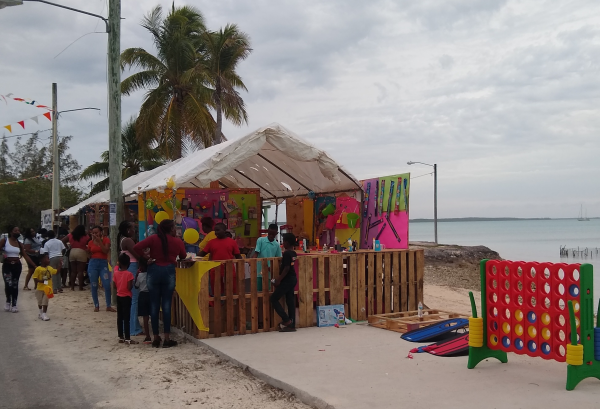
Its Good Friday and we are told by the other cruisers there is food ashore and could hear music. We beached the dinghy. We enjoyed the street food, open bar, good music and meeting other people. Good start of the Easter weekend. Next day filled our water tanks from a tap at the beach, for Free.
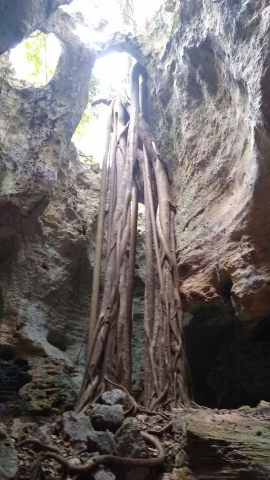
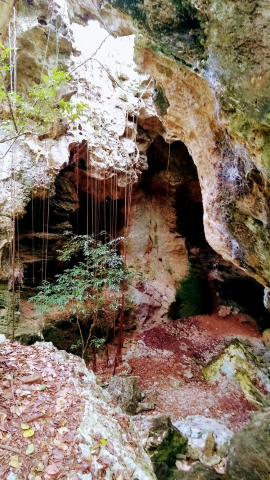
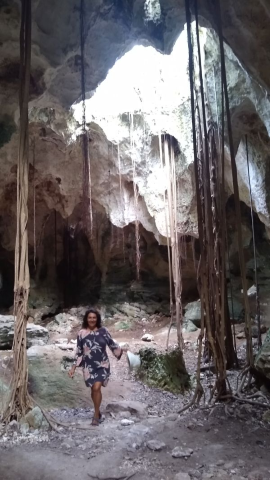
In the afternoon we walked to visit these very cool caves. Cathedral Caves
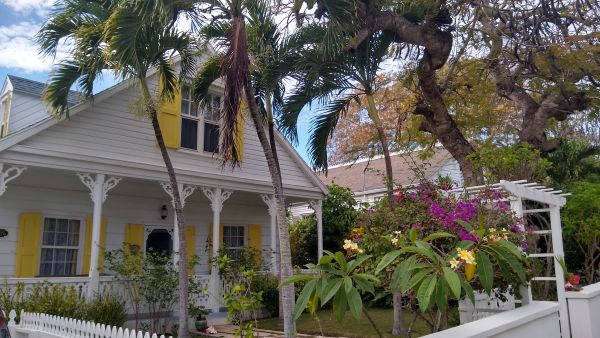
On Easter Sunday we did a short sail to Governor harbour. What a beautiful calm bay, and a picturesque little town.
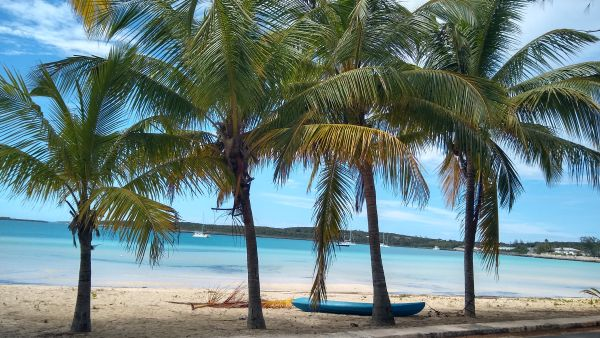
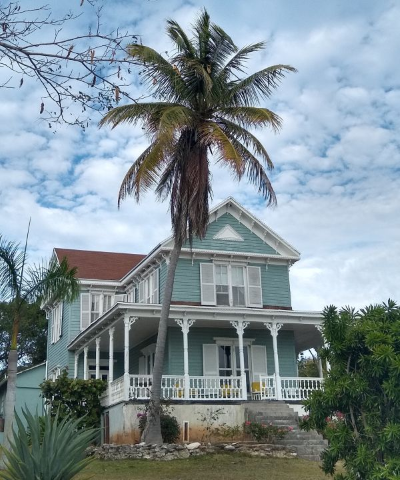
we loved our walk around here, with the beautiful gardens and colonial style homes though out
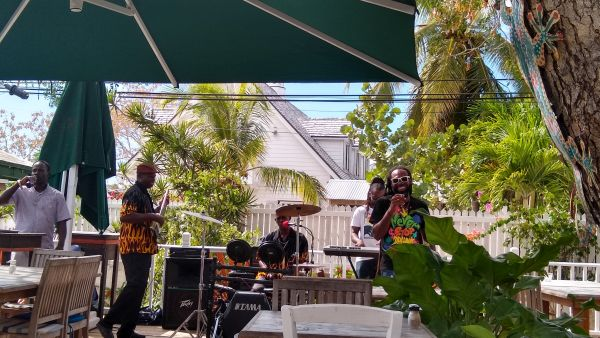
In the afternoon we adventured into a long walk to the pink sand beach. Walking through town we came across this local bar Buckeneers Club, with a live band playing really nice music, so we stopped and had a drink, and listened to the band. I even got Noel to Dance…..
It was a great weekend . Loved it here and will be back
Next anchorage, Hachet Point
Smooth sailing , winds behind and jib out. Anchored in very calm bay. As soon as we arrived I saw a few jelly fish here though.
Our friend told us to go snorkel this pond on a protected area to find seahorses. Noel and I set off on a long and hot walk to this Pond.
With some detours into visiting these caves, that had graffiti all these writings going back to the 60’s. apparently if you take the ladder or steps down, the caves are quite deep. Well, we had no flash light with us, and not feeling that adventurous here.

In all our travels we had never seen seahorses , so we were hoping to finally find at least one. We saw some very different marine life, crab and white shrimps, and we were snorkeling for a long time and about to abandon our search. At last we spotted One
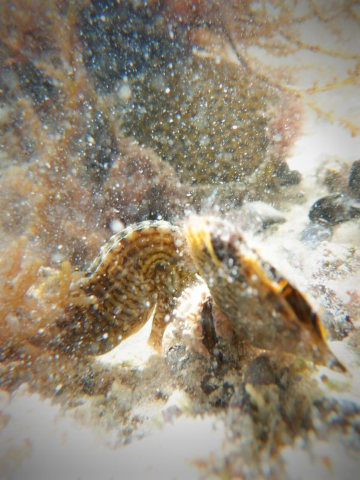
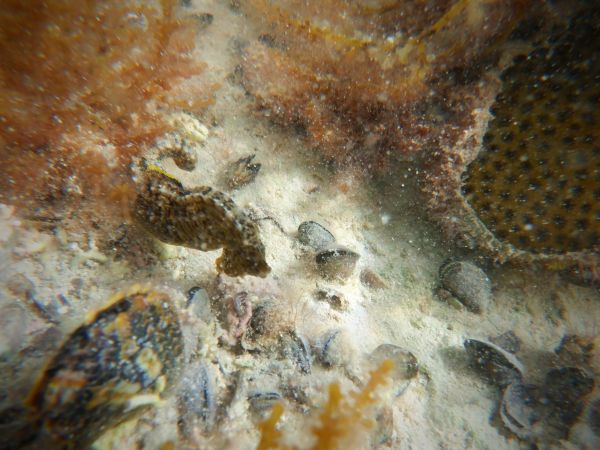
Very cute, not very big, and this one really camouflages in there. So it was very exciting! sure worth the long and hot walk
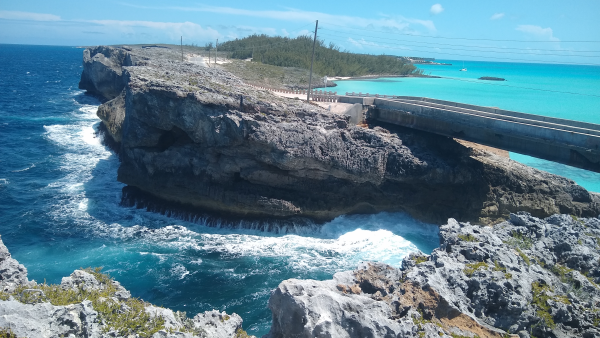
Next anchorage, Glass Window, Eleuthera
Beautiful sail here, about 9 miles, gliding along beautiful cliffs.
One of nature’s true wonders, The Glass Window Bridge will certainly leave you breathless as you drink in the magnificent panoramic view. It is one of the few places on earth where you can compare the rich blue waters of the Atlantic Ocean on one side of the road and the calm Bight of Eleuthera (often incorrectly called the Caribbean Sea) on the other side, separated by a strip of rock just 30 feet wide.
On the eastern, Atlantic side the highway is flanked by ridges leading up to cliff tops 80 feet above the ocean. The approach is thus blind on this side, until you actually reach the bridge where the deep blue Atlantic heaves into view.
the contrast in the blues and a very calm day
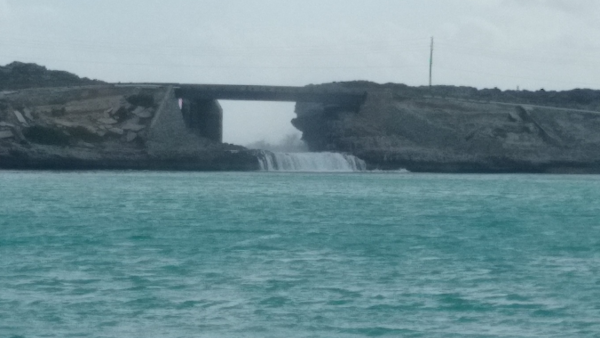
waves crashing and water fall into the other side, high tide and not a calm day
Queen’s Baths or Hot Tubs are a collection of natural pools that border the rugged Atlantic Ocean side of the island, a short walk of 0.6 miles south of The Glass Window Bridge. They were formed over the years through erosion of the rocks by the dramatic crashing waves of the Atlantic Ocean.

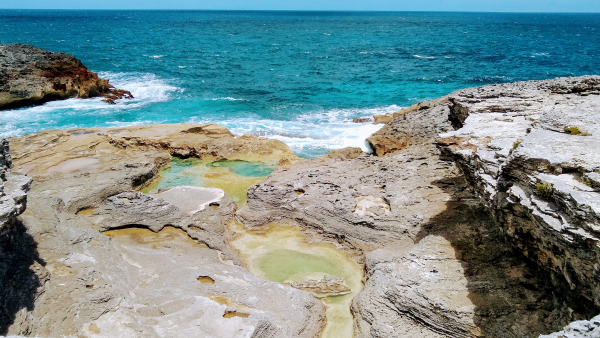
queen baths in a calm day
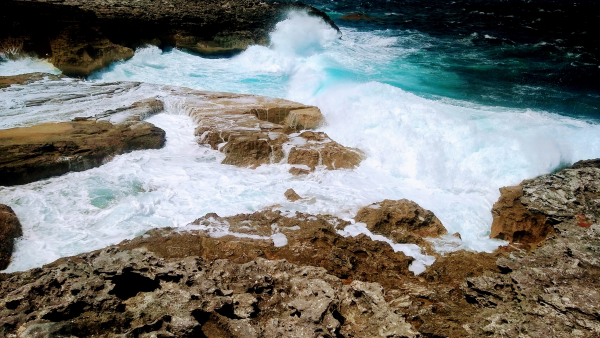
queen baths on a not so calm day.
We went twice to see the difference. It was gorgeous both times. First day at low tide, calm and serene, you can soak in the pools and the next day was totally dramatic with the waves crashing.
Summer 2022 while LP2 rests in Deltaville
May 2022 we left the boat in Deltaville US and went home. So sweet to go home to the kids and grandkids!
We had a very busy summer with travels that took us to Portugal, Spain, Scotland, England and back to Canada.
July 2022
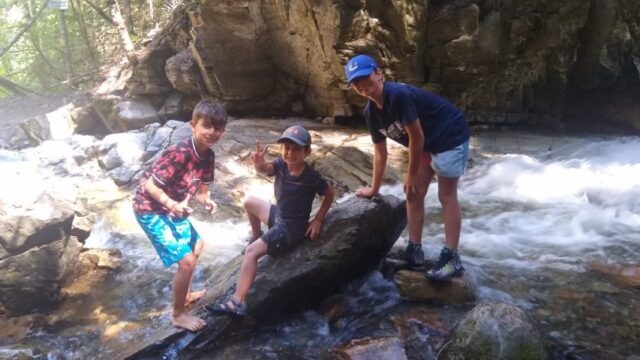
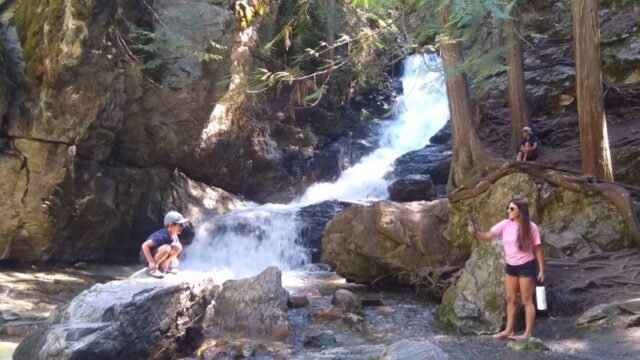
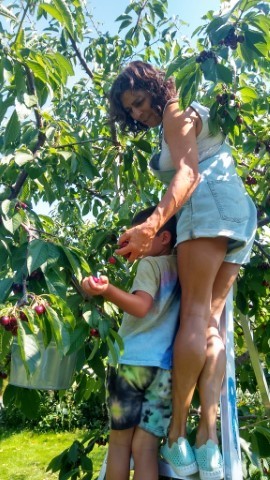
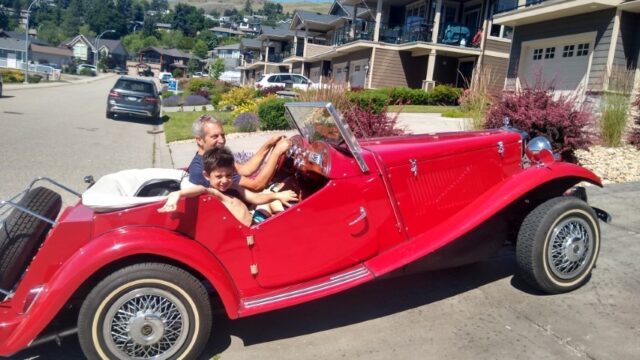
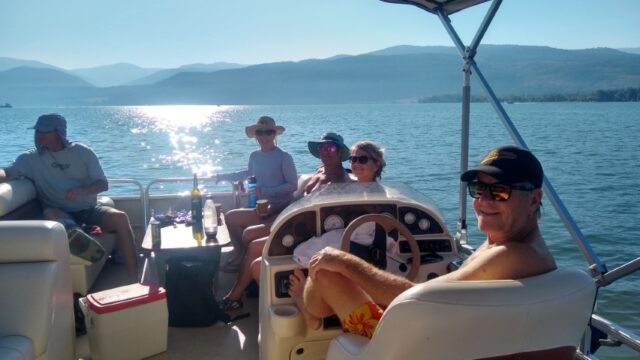
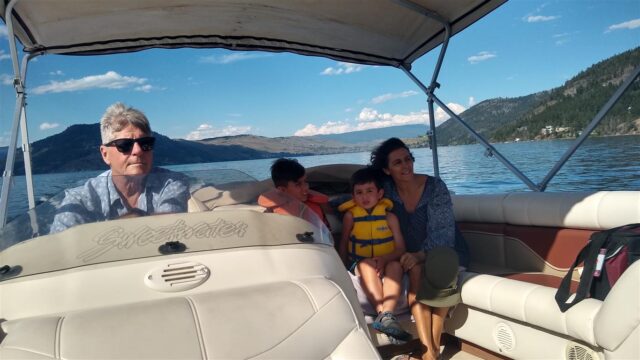
Much fun was had the month of July with the grandchildren
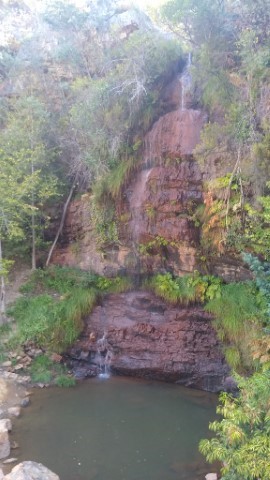
Fun in the sun swimming in the lakes hiking the mountains and waterfalls picking cherries and catching up with family and friends
August and September trip to Europe
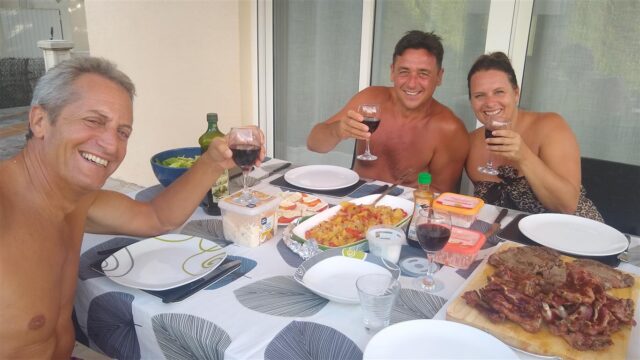
We travelled to Portugal and spent most of the time catching up with family, lots of food and good wine
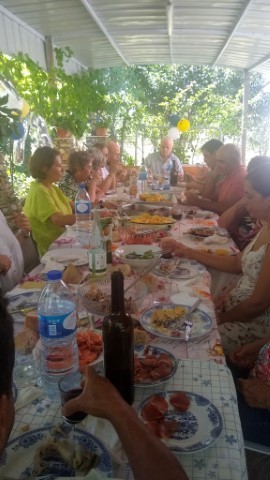


Always lots of fun around this uncle, this time we were celebrating his Birthday at his country house
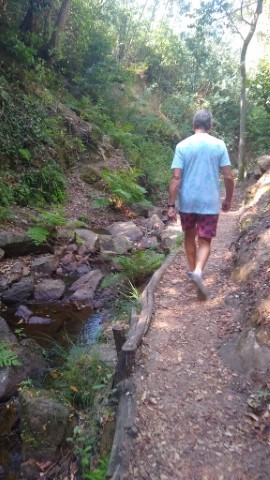
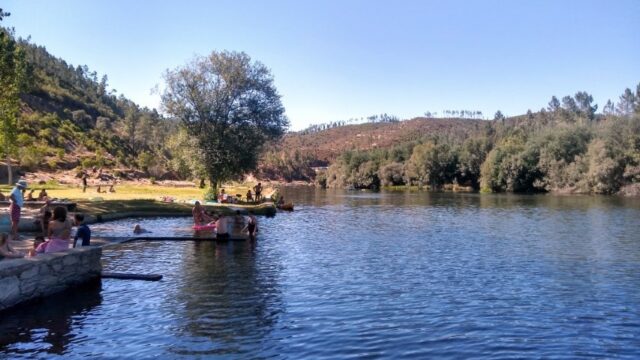
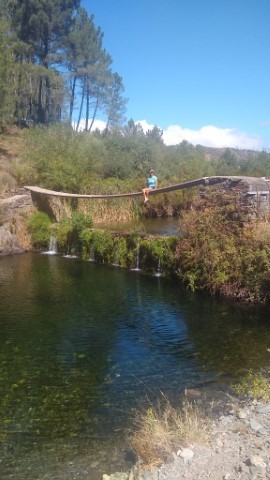
We enjoyed many walks and hikes and a refreshing swim in fresh water lakes
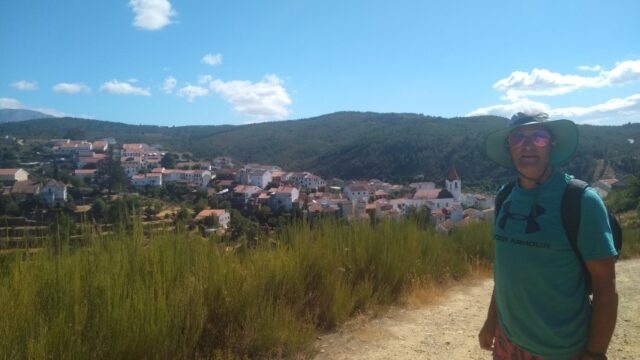

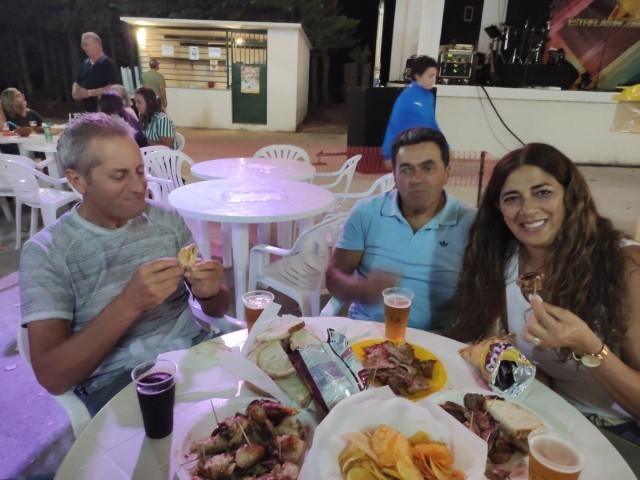
Good times and good laughs in Portugal
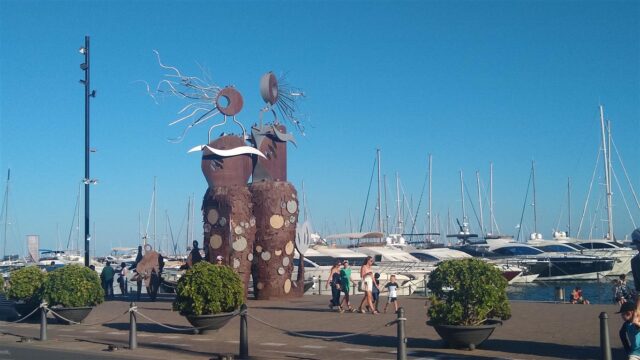
Spain
Two weeks later we flew to Spain and visited some friends for a few days. I was wonderful to meet up again. We had met them sailing in the Caribbean and spending Christmas with them.
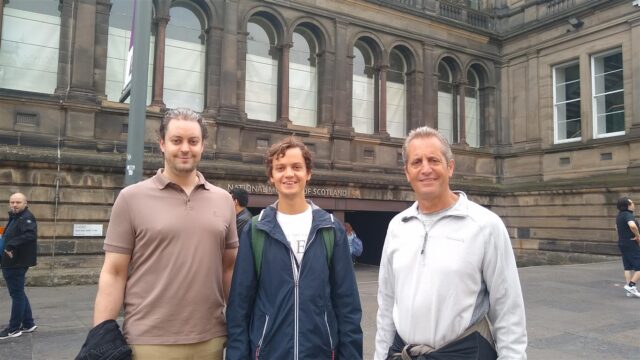
Edinburgh, Scotland
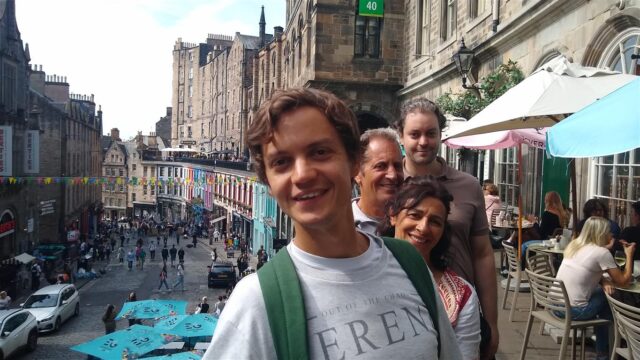
We flew in to Edinburgh and met up with our 2 sons who joined us from England for 6 days of exploring the area.
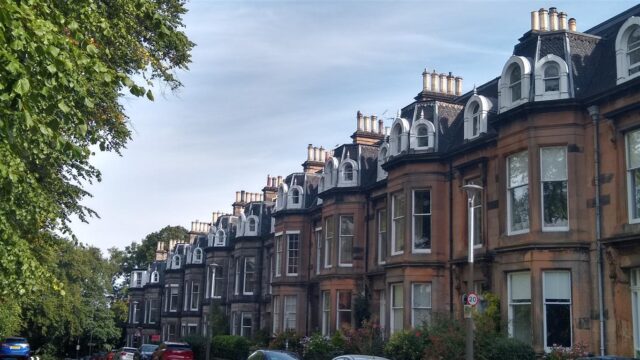
We walked a lot and visited many of the tourist attractions. The castles museums and good food
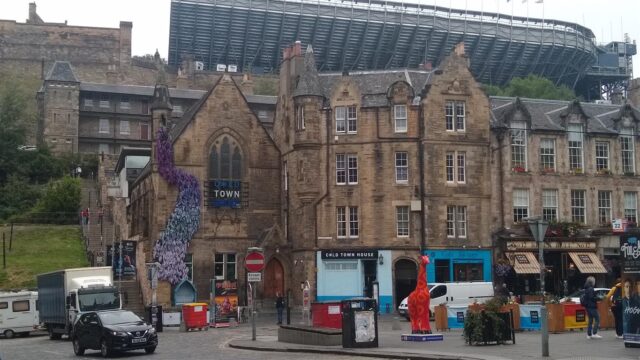
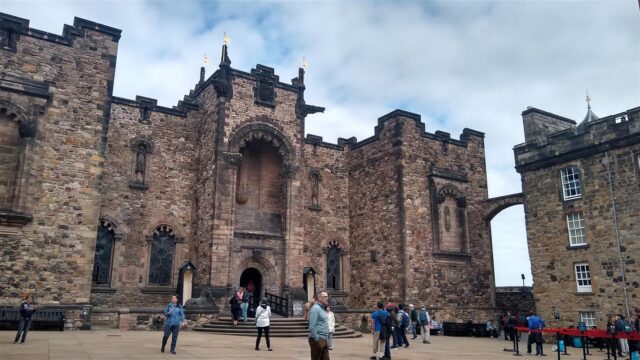
Hoisted high atop Edinburgh, as if monitoring the city below, Edinburgh Castle is not only one of Scotland’s most recognized landmarks, but one of the country’s most-visited attractions. The castle has been home to various royals throughout history, once housed military prisoners within its thick walls and has changed hands between the Scottish and English after many bloody bombardments and sieges throughout the centuries. Inside its stone walls (which survived a World War I bombing), some of the attractions available for visitors to view are the Honours of Scotland (the oldest crown jewels in Britain), St. Margaret’s Chapel (Edinburgh’s oldest building), Mons Meg (considered one of the greatest guns in medieval Europe), the National War Museum, the Great Hall and the vaults that once held prisoners of war (located under the Great Hall). If you hear a loud crack at 1 p.m., don’t worry: It’s the traditional One o’Clock Gun that’s been fired off daily (with few exceptions) since 1861.
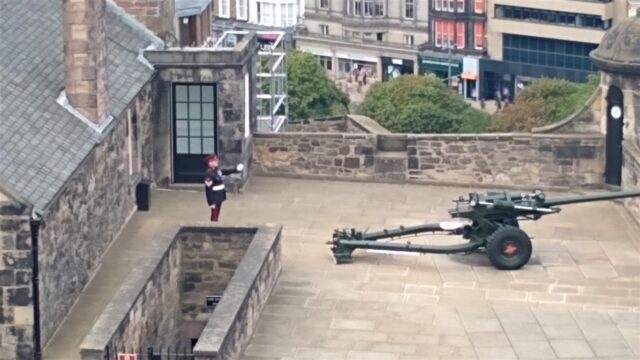
The traditional One o’Clock Gun that’s been fired off daily (with few exceptions) since 1861. Everyday in the Castle grounds the famed One’O Clock Gun is fired precisely at 1pm.
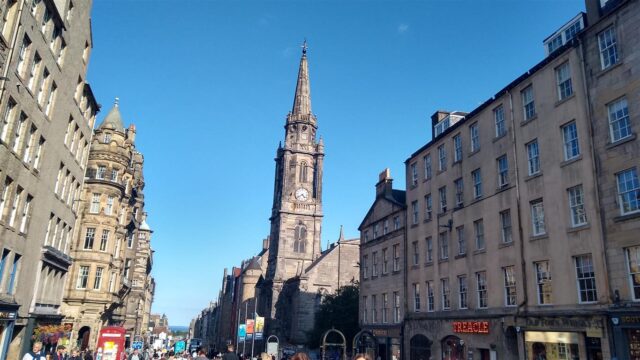
Royal Mile. This route stretches between Edinburgh Castle and the Palace of Holyroodhouse,
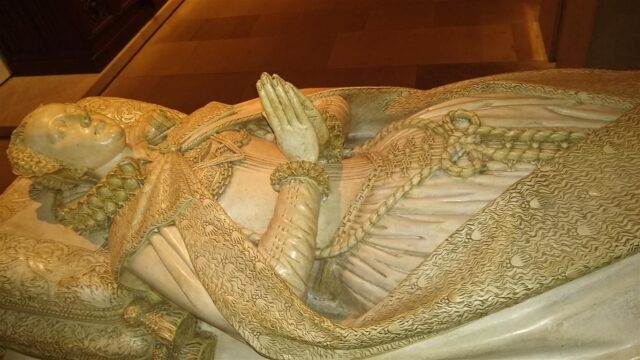
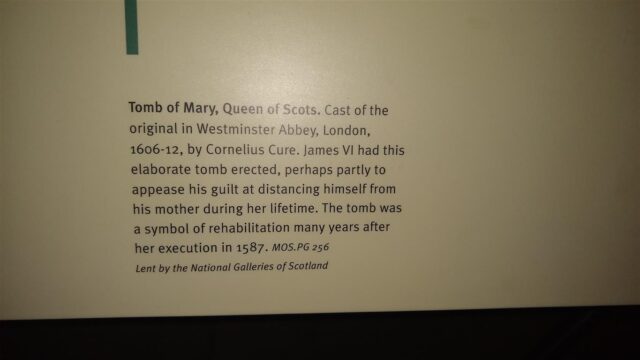
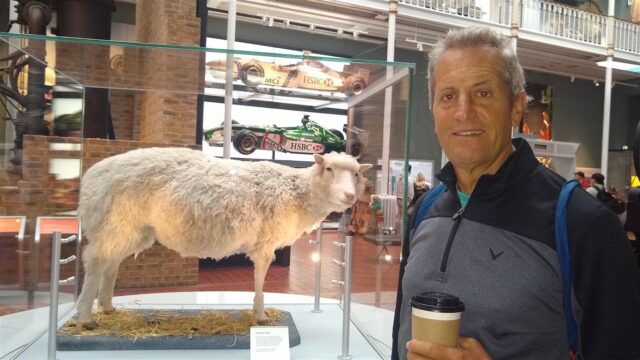
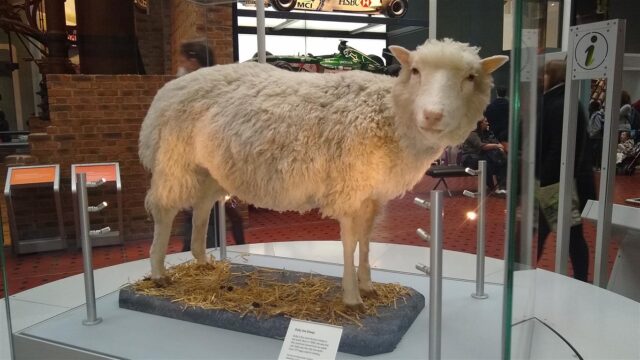
A visit to the National Museum of Scotland where we visited famous Dolly, the sheep. She was donated from the Roslin Institute and has been on display since 2003. Dolly was the first cloned mammal ever to be created from an adult cell in 1997. She lived her life along in a flock of sheep at the Roslin Institute.. After being diagnosed with tumors , she was put to rest in 2003 at the early age of 6 . Apparently sheep live to be 11 0r 12.
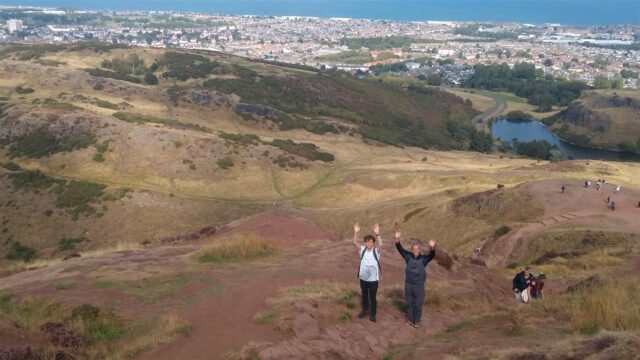
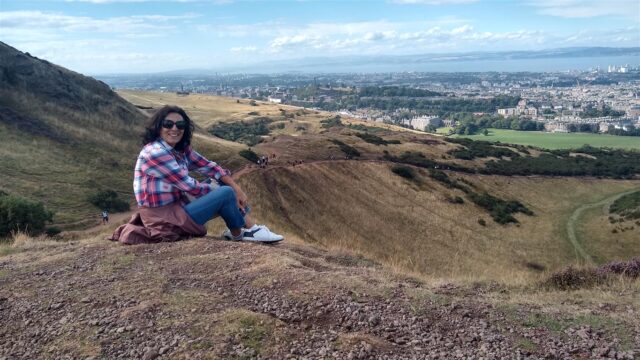
We walked from Holyrood Palace to Artur’s Seat. Some areas were a gentle slope, some was scrambling over rocks, but sure worth it for the Nature walk and stunning views.
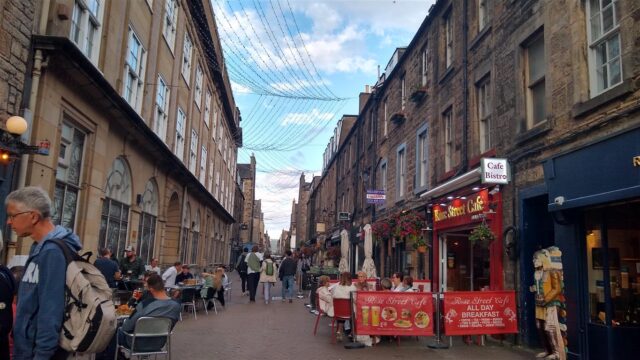
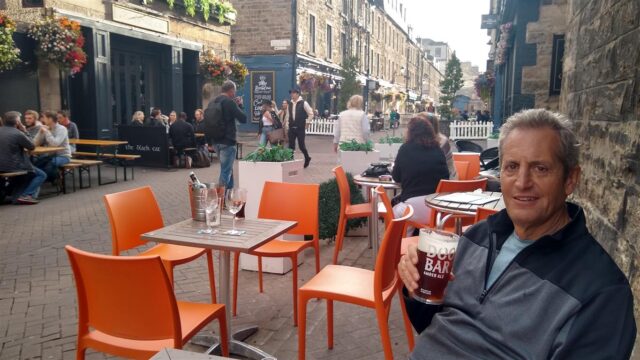
Rose Street was a must visit for a Pint or 2. Noel spent much of his younger days around here while in Fettis College doing his A levels in 1986/87. There are 17 pubs on this one street, so it makes for a challenging pub crawl!
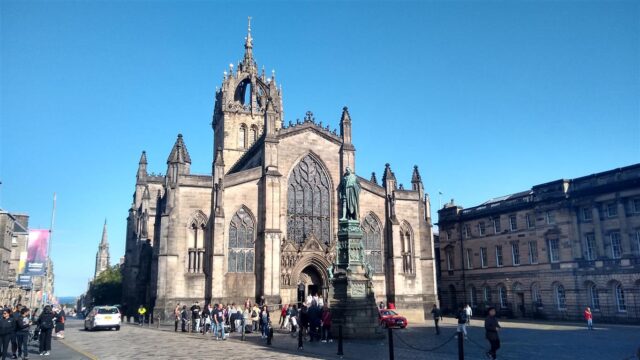
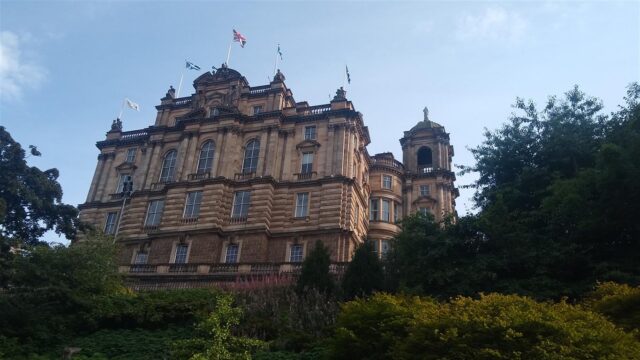
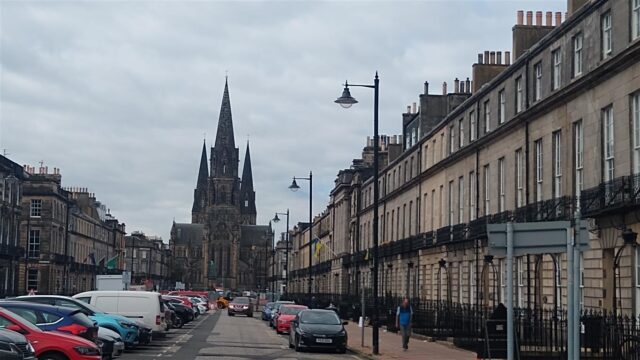
St. Giles Cathedral and most important in Edinburgh has been a focal point for religious activity in Edinburgh for over 900 years, although the structure we see today can trace its roots back to the 14th century. Due to its central location on the Royal Mile in Edinburgh’s historic old town, St. Giles has become a popular tourist attraction, as it’s an ideal stop-off point between excursions to Holyrood Palace and Edinburgh Castle.
The cathedral is beautifully covered from floor to ceiling with detailed carvings and ornate stonework

Last but not least, their famous kilts and shops.
Prior to 1792 those who wanted to wear the kilt in the Lowlands or Britain, had to join the British army. The reason being that because of the swift and competent movements of the Highland armies, the English were afraid that if they let anyone wear the kilt it would spark the idea of revolution.
The kilt is more than just a covering. It allowed those who wore it to move much more freely, weather can become very damp. With its tight weave of strong wool, it created a barrier between the rain and skin. When the armies of the past were fighting in Scotland, the kilt with its pleat helped protect the soldier much like armor would. When the nights became cold, this garment was easily removed and spread out to create a blanket to keep the person who owned it warm. Lastly, if the army needed to move with a much quicker force, the garment could be easily removed, thus allowing the soldier more freedom of movement.
Today the kilt is the national dress of Scotland and worn by many. The various plaids that one can see from time to time are the colors of the particular clan that the wearer belongs to.
Stubington, south of England
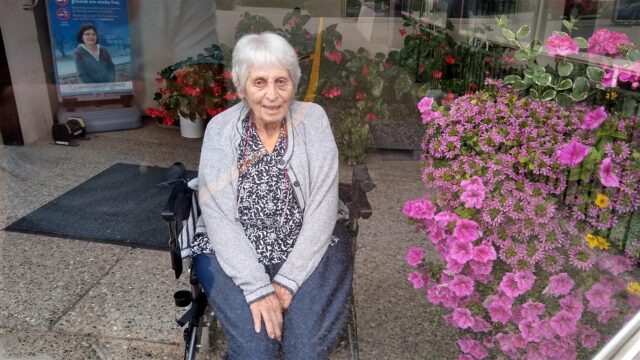
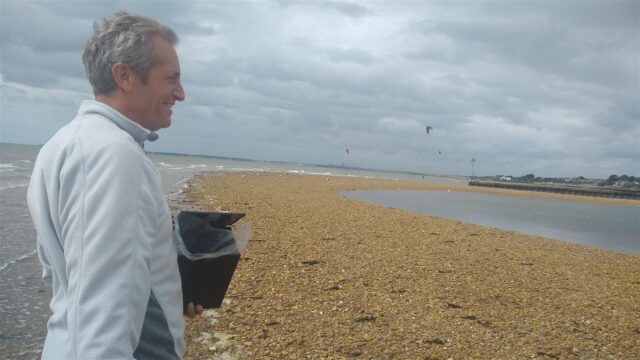
After Scotland we flew with the boys to England to celebrate the life of our beloved Heidi Swanson, who passed away in Canada in February 2022.
 Her ashes were spread out into the ocean as per her request, to join her husband’s.
England was a special place for Heidi, this is where she spent many years during her career and raising the kids, Noel and Mitzi. She was a wonderful person and is surely missed. She always said she had a wonderful life. She lived to almost 93 and died in a senior home in Vernon, BC where our home is.
After this visit in England we returned to our home in Canada for a month or so while getting ready to return to Deltaville and Life P2.
Fall 2022. US coast before crossing to the Bahamas
We arrived in Deltaville and did some work on the boat, like paint the bottom. Unpacked all the Amazon goodies we had sent to the Marina. That was great. Being in the States is sure much easier to receive packages. Unlike in the Caribbean where we had to bring it al from Canada in a suitcase
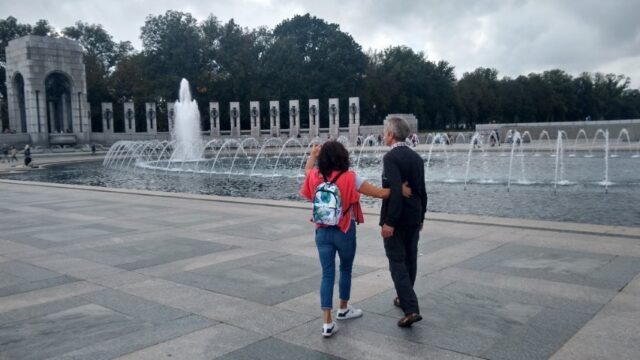
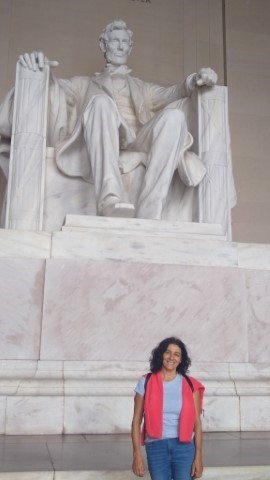
We had our friend Nick and Jess from Colorado come to pick us up by car and we drove to the Annapolis show with a short stop in Washington DC.
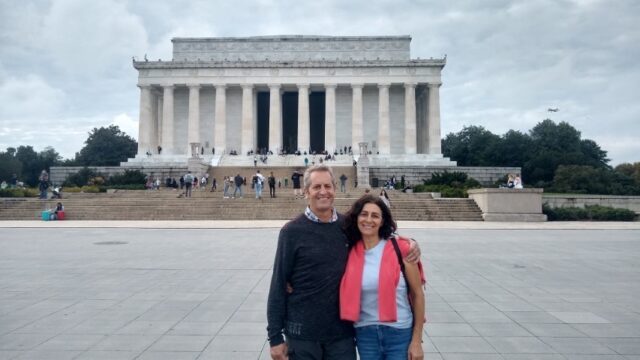
The Lincoln Memorial includes 36 columns of Colorado marble, one for each state in the Union at the time of Lincoln’s death in 1865; each column stands 44 feet (13.4 metres) high.
The interior features a 19-foot (5.8-metre) seated statue of Lincoln made of Georgia white marble.t In 1963, on the 100th anniversary of the Emancipation Proclamation, civil rights leader Martin Luther King, Jr., delivered his famous “I Have a Dream” speech from the steps of the Lincoln Memorial in front of more than 200,000 people.
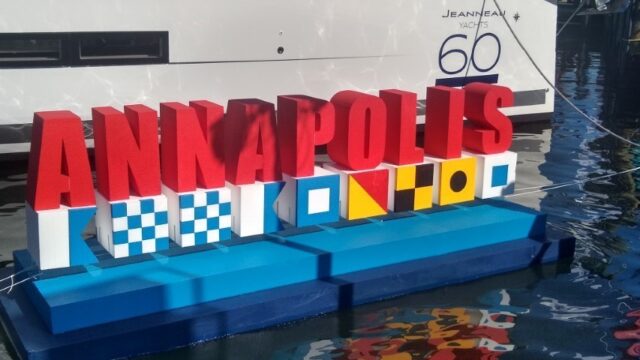
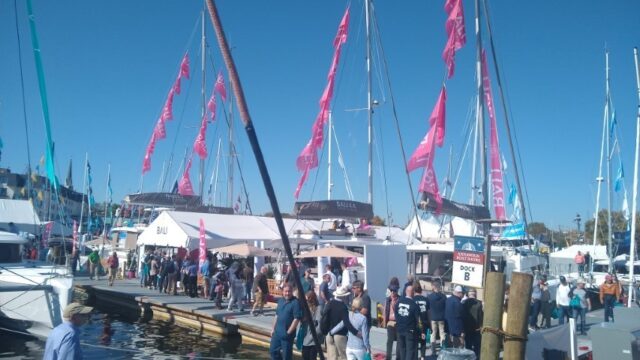
 Annapolis boat show Oct 2023
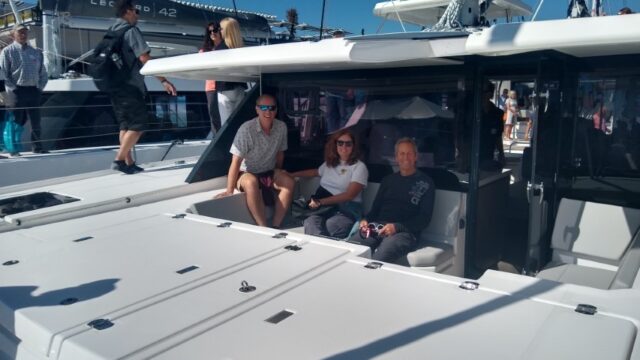
Checking out the new Leopard, so beautiful, with walkout door into another seating area
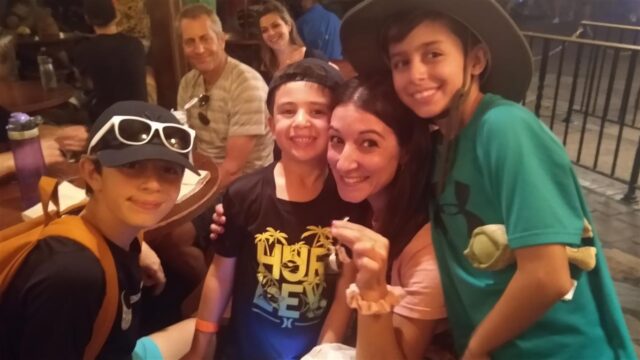
After our return to Deltavile, Jess went back to Colorado and Nick stayed onboard for some sailing and to help us do the long trip down the coast. We were planning to make it to Florida by beginning of November, and we were to meet the kids and grandkids in Disney world.
We left to Hampton where we did some provisioning and staged ourselves to go south. Here we found out the prop shaft came apart on Port side. Noel tried to fix it and the bolt sheared right off. Spent almost all day trying to find a new split coupling. Found one in Norfolk, arriving in 2 days. We sure hope so, because we had a good weather window to leave by then.
We sailed the short distance to Norfolk. Walked around town, grabbed a coffee and took a bus to get the part for the prop. the part did not fit. Had to wait another day or 2 for the next part. Part installed and we leave for Hampton, a very protected anchorage. Also installed Radar here.
We left Hampton Sunday Oct 23. We had 20 kts of wind and a bit of rain. Shortly after the wind picked up and gusts to 30 kts. We reefed the main and the jib. The waves were also a bit big and both Noel and I felt sea sick, I guess we didn’t have our sea legs yet! One hour later we were sailing nicely on a beam reach and rain had stopped.
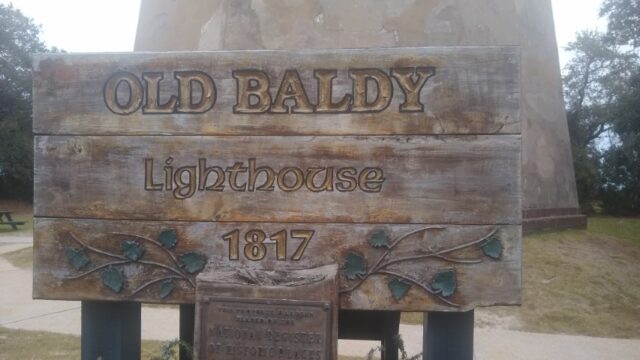
Early in the evening, Noel felt very sick, with fever, tremors and teeth shattering. His legs were so weak he could barely stand up and walk to the toilet. All happened very quickly. One hour later he felt better and had a good sleep. Nick and I did the night watch. It was a big scare for me and I was so so glad we had Nick onboard. The next day we rounded Cape Hatteras in pretty nice weather and sea state. 2 days later we had make it to Cape Fear and anchored 12 nm up the inlet to visit Bald head island. Beautiful and well maintained homes and landscapes, quaint little cafes and restaurants. Noel did a short walk, as he was still not feeling great, and Nick and I walked along and around the beautiful beach and back to the boat.
The next day we weighed anchor, but shortly before that, we heard a big bang . Turned out to be the stainless steel shackle on the bridal broke. The boat had gone around in a big circle, and with all the twisting, the big ring broke. However we did have a replacement with a dynema one. We set to Charleston and had a great sail down wind and smooth seas.
We arrived in Charleston the next early morning and anchored in this big bay, with lots of lights and a bridge all lit up. Very pretty. Here in Charleston, our friend Nick left us to go back home and Noel went into emergency to check himself out. After testing, the results showed he had a kidney infection, which he was prescribed antibiotics for. After a few days he felt fine. At this point we decided to leave the boat in Charleston and we rented a car for a week to go to Disney World and meet the kids.
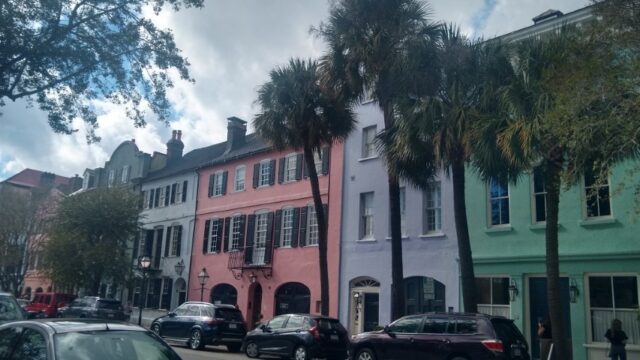
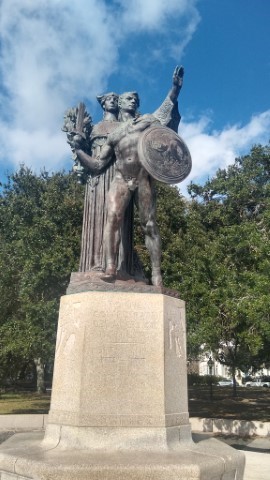
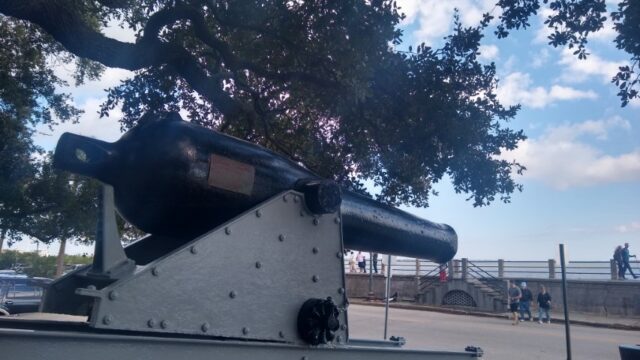
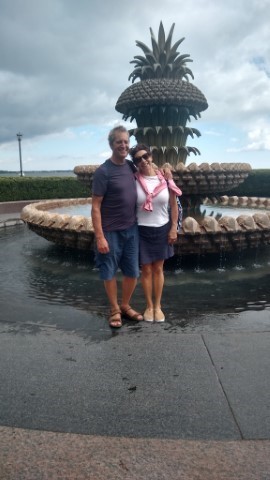
Charleston SC
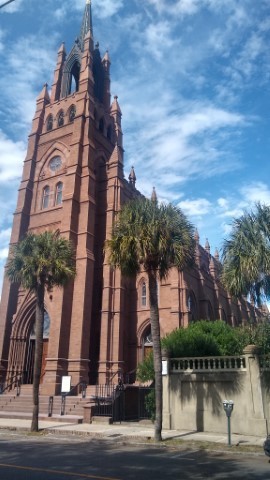
Walking around Charleston. It’s such a beautiful
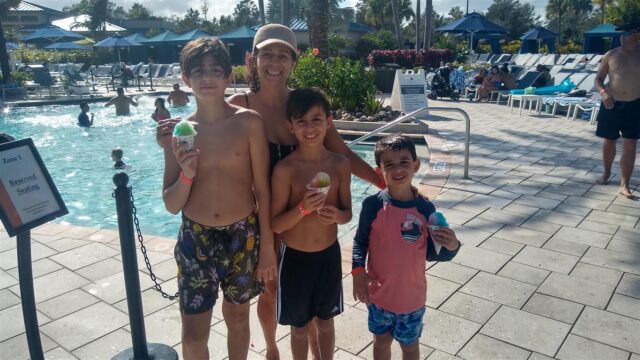
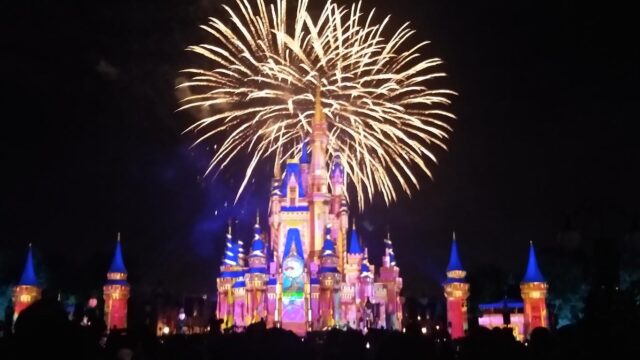
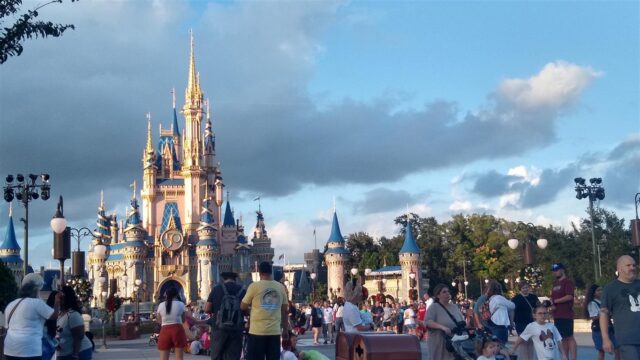
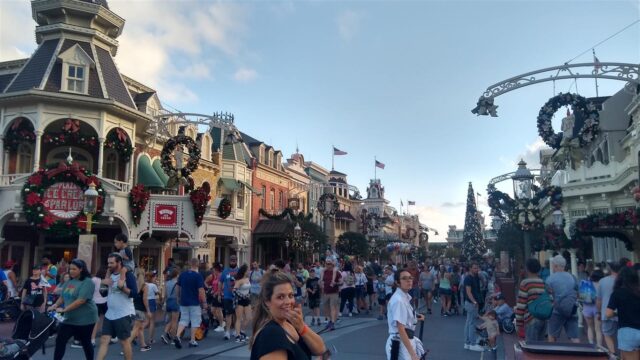
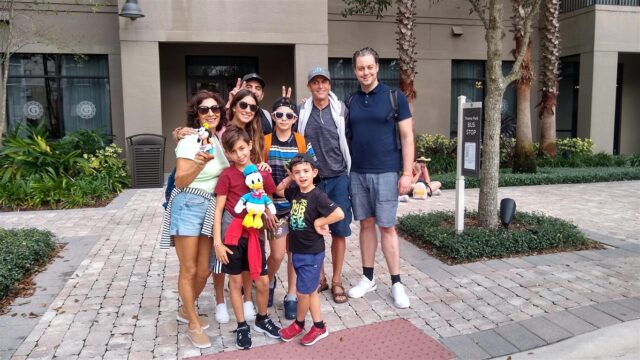
Disney World with the kids
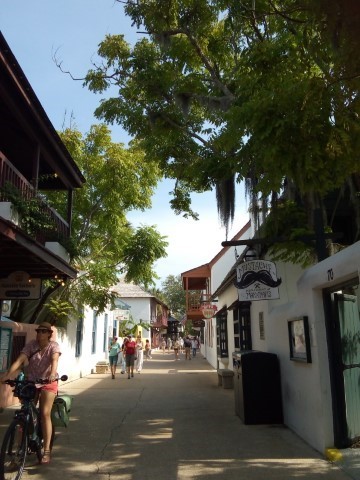
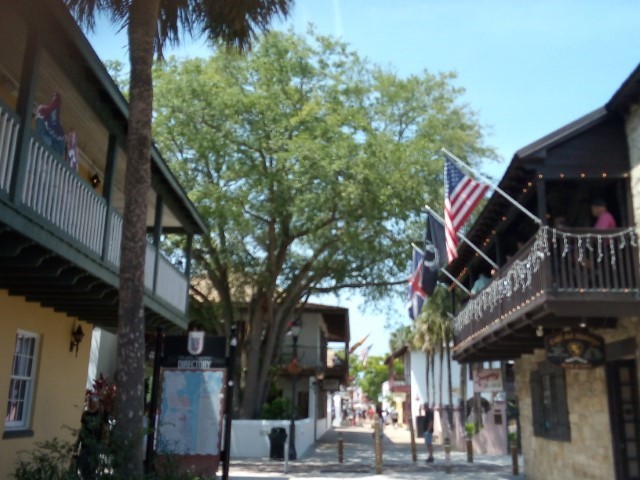
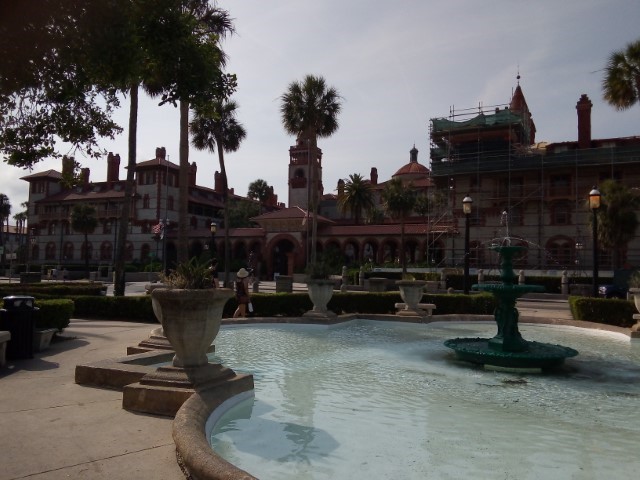
St Augustine Florida
We loved St Augustine. The streets near the water lined with beautiful art galleries, pedestrian street for shopping and Restaurants of every ethnicity you can think of, the shops and pubs and access to provisions.
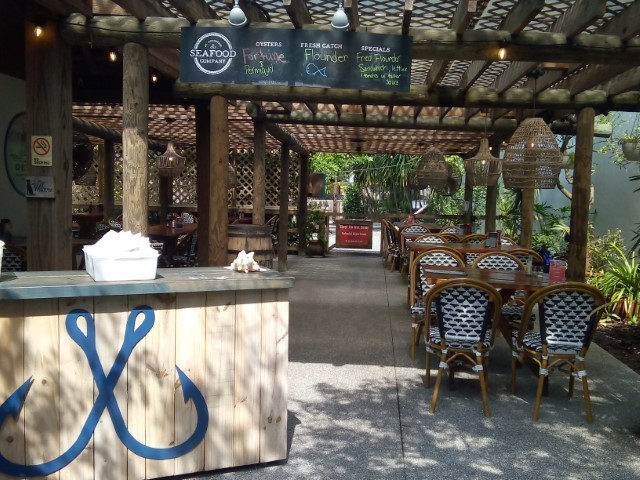
We found a pub where you buy and pour your own beer by the ounce, so you can try the many beers available. Noel loved that idea, you find the ones you like you pour yourself as much or as little as you want – even just one ounce if you want to try it. Then you just pay for the amounts of each beer that you actually tried.
This place also has only long tables. The idea is that you share with other people at the same table. In our case we met a young couple visiting for the weekend. Fun idea.
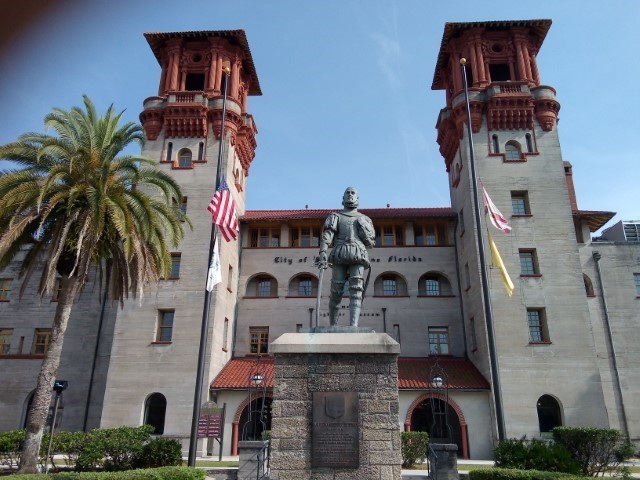
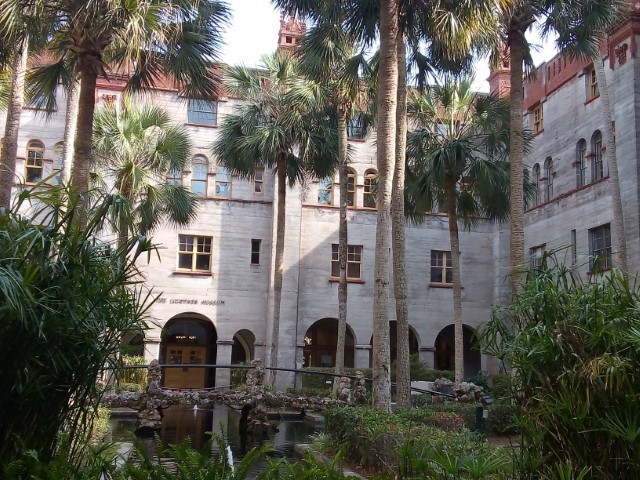
The Hotel Ponce de Leon, also known as The Ponce, was a luxury hotel in St. Augustine, Florida, built by millionaire developer and Standard Oil co-founder Henry M. Flagler. Built between 1885–1887, the winter resort opened in January 1888. The hotel was designed in the Spanish Colonial Revival style as the first major project of the New York architecture firm Carrère & Hastings, which gained world renown for more than 600 projects, including the House and Senate Office Buildings flanking the US Capitol. Their final project was the New York Public Library.[5][6]
The hotel is the first of its kind constructed entirely of poured concrete,[5] using the local coquina stone as aggregate. The hotel is one of the first buildings in the country wired for electricity from the onset, with the power being supplied by DC generators installed by Flagler’s friend, Thomas Edison.
Since 1968, with the founding of Flagler College, the original building and grounds of the hotel serve as the centerpiece of the campus Flagler College.

We spent a few days here also visiting with other fellow cruisers and friends. We sailed down with SV Baradal, Martina and Uli, German flag, and SV Duende, Cindy and Kevin, American. We kept saying we are headed south until the butter melts. Its much warmer here than it was further North. We also met Mareika, German lady who came over for a drink. She was headed to the Bahamas the next day. She planned to do the Pacific. She is single handed, but always has crew for long passages.
Our next stop was Fort Peirce, about 165 nm, so included a night trip. it was down wind, so we used the spinnaker for quite sometime.
We anchored nicely at 9am near a bridge in ICW. The next day we rented a car and drove to, Titusville, Cape Canaveral, where our friends had anchored to watch a rocket launch. We picked up pizza on the way there, and we joined Martina and Uli on their boat for the show. It was very cool to see.
It was nice to have a car, so we did provisions. The Bahamas is very expensive and not so much is available. We keep stocking up as we go down the coast before crossing to the Bahamas.
We had dinner at the Marina and celebrated my Birthday. Went shopping with Cindy on SV Duende, and we both had a pedicure.
From here, Fort Pierce, we sailed to Palm beach a distance of about 50NM.
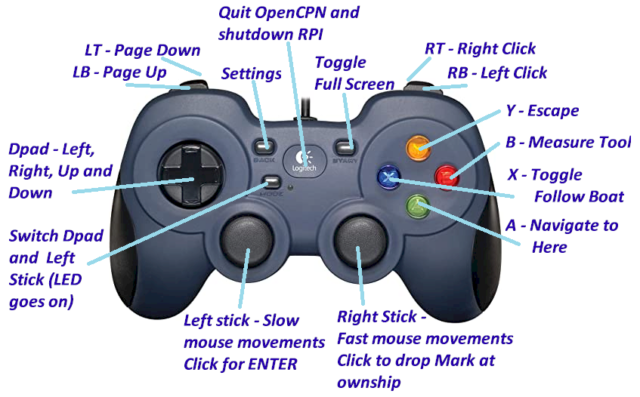
How to Use a X-Box Controller with OpenCPN
We use OpenCPN as our primary navigation tool, running it on a Raspberry Pi 3B using OpenPlotter as the basic platform. Although OpenPlotter has a lot of additional features, we don’t actually use them, just OpenCPN as our chartpolotter. We have an Eyoyo LCD screen at our helm station.
It all works well, except that operating OpenCPN with a large wireless keyboard or even a mini keyboard really does not work great. The large one is too cumbersome, the small one too fiddly.
So we have now switched to using a wired x-box 360 controller. Well, actually, we are using a Logitech F310 which we bought from the Source in Canada for C$25. It plugs into the Raspberry Pi with an ordinary USB cable. We have an extension USB cable that goes to a panel-mounted USB 3.0 socket next to the Eyoyo screen.
That works great. But it does require some configuration to get it working. Since I just spent an entire week getting it all working correctly, I thought I would save you some time by outlining all the steps. To do this you are going to have to use some command line Linux commands by means of the Terminal, which you can open by going on the desktop to Main Menu -> Accessories -> Terminal. Don’t forget to put sudo at the beginning of each command so as to grant the comman admin privileges.
You will also need to be connected to the internet.
This assumes that you are using Raspbian 10 (Buster). It will probably work on later versions, but this is what we have, and what works for us. Actually, we just upgraded to a Raspberry Pi 4B with Bullseye, and it works even better on that. Will this work on Windows? Yes, but you will have to figure out how to install xboxdrv and get it running on initial boot. Also, note that I am no expert on Linux. This is what I managed to put together after a whole week of working on it. I hope it works for you too, but if it doesn’t you are on your own in figuring it out. Google is your friend. When you do look stuff up, always make sure that what you read applies to your current operating system – eg Buster, not Stretch etc.
NOTE: when you create these files, and especially the shell scripts (that end with .sh) you need to do this either within the raspberry pi, or on another linux system or, if you do it in windows, make sure your text editor (eg. notepad++ ) uses Linux line endings (LF) and not windows (CR LF) or Mac (CR) line endings, otherwise these will likely not work. There is a setting for this in the Edit tab on Notepad++.
Before you start this, make sure you backup your current working SD card so that you can recover to it if you screw something up. (google “how to backup raspberry pi sd card”)
So, start by exiting OpenCPN and returning to the Desktop environment.
1. Install xboxdrv
This is the utility that will convert your controller to a keyboard and mouse so that you can manipulate OpenCPN. You can read about it here. To do that type into the Terminal the following:
sudo apt-get update
sudo apt-get install xboxdrvsudo rmmod xpad
sudo modprobe uinput
sudo modprobe joydev
2. Write the Configuration Files
These tell xboxpro how to map the keys on your controller to keyboard and mouse events so that it will do what you want it to do.
Navigate to the location for the files:
cd /usr/share/doc/xboxdrv
ls
This will give you a list of files including a directory called examples which contains some example configuration files that you can play with. But you don’t need them.
Create a new configuration file by typing in:
sudo nano logitech.xboxdrv
This will bring up the ‘nano’ text editor.
Into this type (or copy and paste) the following (lines that begin with # are comments that don’t have any programming action. If a line has text but does not start with # Linux will try to execute the line as code, so make sure any line with comments in it begins with the hash #.):
# Mouse Emulation
# ===============
#
# This configuration file emulates a mouse. Both sticks control the mouse.
# The left one allows for slow fine controll, the right for more rapid
# movements.
# The controller buttons are configured as follows:
# LB does page up (i.e zooms into the chqrt) and LT does #page down (zoom out).
# A (Green) = Navigate to here
# B (Red) = Start Measure tool ( = M key). If you want to drop a MOB marker instead, edit the appropriate line below, but you may keep dropping it by accident.
# X (Blue) = Auto follow boat (= F2) toggle on/off
# Y (Yellow) = Escape# Left Stick press down = Enter
# Right Stick press down = Ctrl-SPACE = Drop MOB Mark at cursor (to
#enable this you will need to manually edit the OpenCPN config file, the location of
#which can be found by clicking the Help menu tab, and then the About item.
#NOTE: you must edit this whle OpenCPN is CLOSED otherwise your changes
#will be overwritten. Change the setting for SpaceDropMark to -1 (0 will
#deactivate it)# RB = Left mouse click
# RT = right mouse click (usually brings up a menu)# Dpad = left, right, up and down keys (use these to
# pan the display or move up and down in menus# BACK = open settings/options dialogue
# START = F11 toggle full screen# Mode = this will light up the LED and swtich the
# functions of the Dpad and the left stick[xboxdrv]
#ui-clear=true
silent = true
detach-kernel-driver = true
mouse = true
trigger-as-button = true[axismap]
Y2=Y1
X2=X1
X1=X2
Y1=Y2[ui-axismap]
X2^dead:1000 = REL_X:750:-1
Y2^dead:1000 = REL_Y:750:-1[ui-buttonmap]
x = KEY_F2
#b = KEY_LEFTCTRL+KEY_SPACE
#The line above will drop a MOB marker at the current GPS positionb = KEY_M
#The line above will turn on the Measure Tool. Use the Y button to ESC from that.a = macro:navhere.macro
y = KEY_ESCrb = BTN_LEFT
rt = BTN_RIGHTlt = KEY_PAGEDOWN
lb = KEY_PAGEUPtl = KEY_ENTER
tr = KEY_LEFTCTRL+KEY_SPACE
#This will drop a MOB mark when you press down on the right joystick[ui-buttonmap]
dl = KEY_LEFT
dr = KEY_RIGHT
du = KEY_UP
dd = KEY_DOWNstart = KEY_F11
back = KEY_LEFTCTRL+KEY_COMMA
guide = macro:shutdown.macro[ui-axismap]
X1^resp:-30768:-15284:-8899:-5469:-872:-300:-200:-100:-50:0:50:100:200:300:872:5469:8898:15283:30767
Y1^resp:-30768:-15284:-8899:-5469:-872:-300:-200:-100:-50:0:50:100:200:300:872:5469:8898:15283:30767
# This defines the speed of the right joystickX2^resp:-3768:-200:-100:0:100:200:3767
Y2^resp:-3768:-200:-100:0:100:200:3767
# This defines the speed of the left joystick (much slower)# EOF #
Now we need some macro files:
The first is to shutdown the whole system when you press the Guide Button
sudo nano shutdown.macro
and then insert this text (the ‘0’s are zeros):
send KEY_LEFTCTRL 1
send KEY_Q 1
wait 1000
send KEY_LEFTCTRL 0
send KEY_Q 0
wait 50
send KEY_LEFTMETA 1
wait 50
send KEY_LEFTMETA 0
send KEY_UP 1
wait 50
send KEY_UP 0
send KEY_ENTER 1
wait 50
send KEY_ENTER 0
send KEY_ENTER 1
Save and exit using ctrl-X
With this we also need a shell script to run it:
sudo nano shutdown.sh
and the contents (type this into the text editor):
sudo shutdown now
Save and exit using ctrl-X and then make executable with
sudo chmod +x shutdown.sh
Next is the macro to set up the temporary ‘Navigate Here’ route:
sudo nano navhere.macro
and the contents:
send KEY_LEFTCTRL 1
send KEY_M 1send KEY_M 0
send KEY_LEFTCTRL 0send BTN_RIGHT 1
wait 50
send KEY_DOWN 1
send KEY_DOWN 0
send KEY_DOWN 1
send KEY_DOWN 0
wait 50
send KEY_ENTER 1
wait 50
send KEY_ENTER 0
Save and exit using ctrl-X
Now create a new startup file by typing in:
sudo nano logitech.sh
Into this you can insert the following text (only two lines):
#!/bin/bash
sudo xboxdrv -D -c /usr/share/doc/xboxdrv/logitech.xboxdrv –silent & sleep 1
When you have done that, save it by typing Ctrl-X and then following the prompts. This should bring you back to your command line prompt.
Now you need to make this file executable by typing:
sudo chmod +x logitech.sh
Test all this as follows:
plug in your controller and make sure the switch on the bottom is set to ‘X’ for x-input.
type in:
sudo logitech.sh
This will run the script that will start up xboxdrv that will (hopefully) recognise your controller and then use the configuration file to map the keys.
Now we need to set it up so it will run at boot. Assuming you are using a LXDE desktop (eg OpenPlotter) first we edit the autostart file:
sudo nano /etc/xdg/lxsession/LXDE-pi/autostart
Type in the startup command at the end of the file before the exit 0 line (if there is one):
@bash /usr/share/doc/xboxdrv/logitech.sh &
Save it with ctrl-x.
Now reboot the system
sudo reboot now
and the game controller should now be recognised at boot up, even if you plug it in later.
You should now be able to use the joysticks as a mouse. Using your mouse you can now launch OpenCPN and play around with it, using your controller. Once OpenCPN is launched you will probably have to left-click (RB button) so the controller knows to work inside OpenCPN.
When you have done that, here is a tweak for OpenCPN that will make it easier to use:
Go to the OpenCPN Settings dialogue (press the ‘start’ button – just to the right of the dpad – on the controller). Then go to User Interface and about halfway down you will find an option to Enable Touchscreen interface. Turn this ON as it will make it easier for you to hit a target (eg a waypoint) with your cursor. Then when you are near a target you can left-click it to select it. It will then stay selected (highlighted in yellow) until you deselect it. In the meantime you can drag it somewhere by clicking on it again and holding in the RB (left click) button and dragging the item with either of the joysticks.
If you need to actually type in something (eg to name a waypoint) you can, obviously, plug in a real keyboard, or you can use a virtual one. To do that press the ‘start’ button on the controller which will take it out of fullscreen mode (assuming you were in that). Then you can find the keyboard either on the top toolbar, or else go to the Raspberry start icon -> Accessories -> Keyboard.
Now go and make another (dated) backup of your SD card. If you keep a series of dated backups you can always revert back to the last one that worked properly.
That’s it, hope it works for you: 🙂
End of Season 2022 Bahamas to the Chesapeake
Last blog left us in Eleuthera in April 2022. We then sailed up to Abacos to wait for a weather window and sail across the Gulf stream to the Cheasapeake.
We got fuel and a few fresh vegetables to top us the fridge in Marshtown,
April 27th we departed from Man a war Cay, Abacos
The trip was was 5 days and 5 nights. we left on a beautiful starry night and also the sea was glowing with phosphorecents
We had our first squall in the morning, winds up to 28kts. Noel put in a second reef. by the evening it all had settled down although we had some current against us. We mostly sailed, but also motored, we had some calms, where we played upwords and Mexican train.
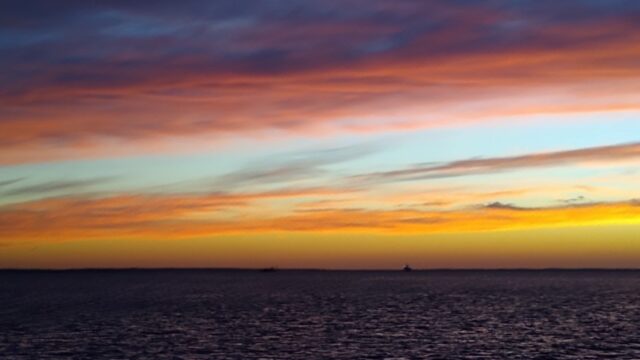
Third nigh just before sunset, cruise ship Carnival Legend passed near, all beautifully light up.
We were looking forward to going to the US somewhere new, explore a bit more and leave leave the boat in Deltaville for the hurricane season.
Our first stop was Hampton. We motored up Hampton River and anchored right downtown by the Marina and Town Docks. We dinghied over and were met by Customs. They were friendly and helpful, and wanted to come onboard to do an inspection for forbidden foodstuffs. When they realised we would have to ferry them over by dinghy they changed their minds! Cruising Permit in hand we were all set.
The only problem was the COLD! We were freezing. We took a bus trip to Walmart to buy some warmer clothes. And then we met the catamaran Duende, with Kevin and Cindy on board – and they had a HEATER! Apparently this was unseasonably cold but that was no consolation.
Hampton was nice though. Easy access to the bus to West Marine where we exchanged our wrong oil filters for the right ones. The Dock provided free showers and would also receive packages for us. And the nearby NASA Air and Space Museum was a fun visit. As was the hundred-year old carousel with hand painted horses.
Then we went up to Deltaville and got ourselves nicely hauled out followed by a flight home. Again, not without drama. We had arranged for the marina employee Colin to drive us to the airport in the morning. But he slept in! Finally we were able to wake him up by telephone and did manage to get to the airport on time. Colin repeated the same performance when Rod went to the airport. Not very impressive.
And so we arrived home. It’s always nice to be home.
Mid-Ocean Live Update
Current Position: 35°40.88'N, 75°15.79'W
Distance sailed since last post: 161 nautical miles
(Sent by InReach satellite connection)
Mid-Ocean Live Update
Current Position: 33°15.59'N, 76°40.92'W
Distance sailed since last post: 159 nautical miles
(Sent by InReach satellite connection)
Mid-Ocean Live Update
Current Position: 30°42.24'N, 77°29.81'W
Distance sailed since last post: 148 nautical miles
(Sent by InReach satellite connection)